Cactus Hat
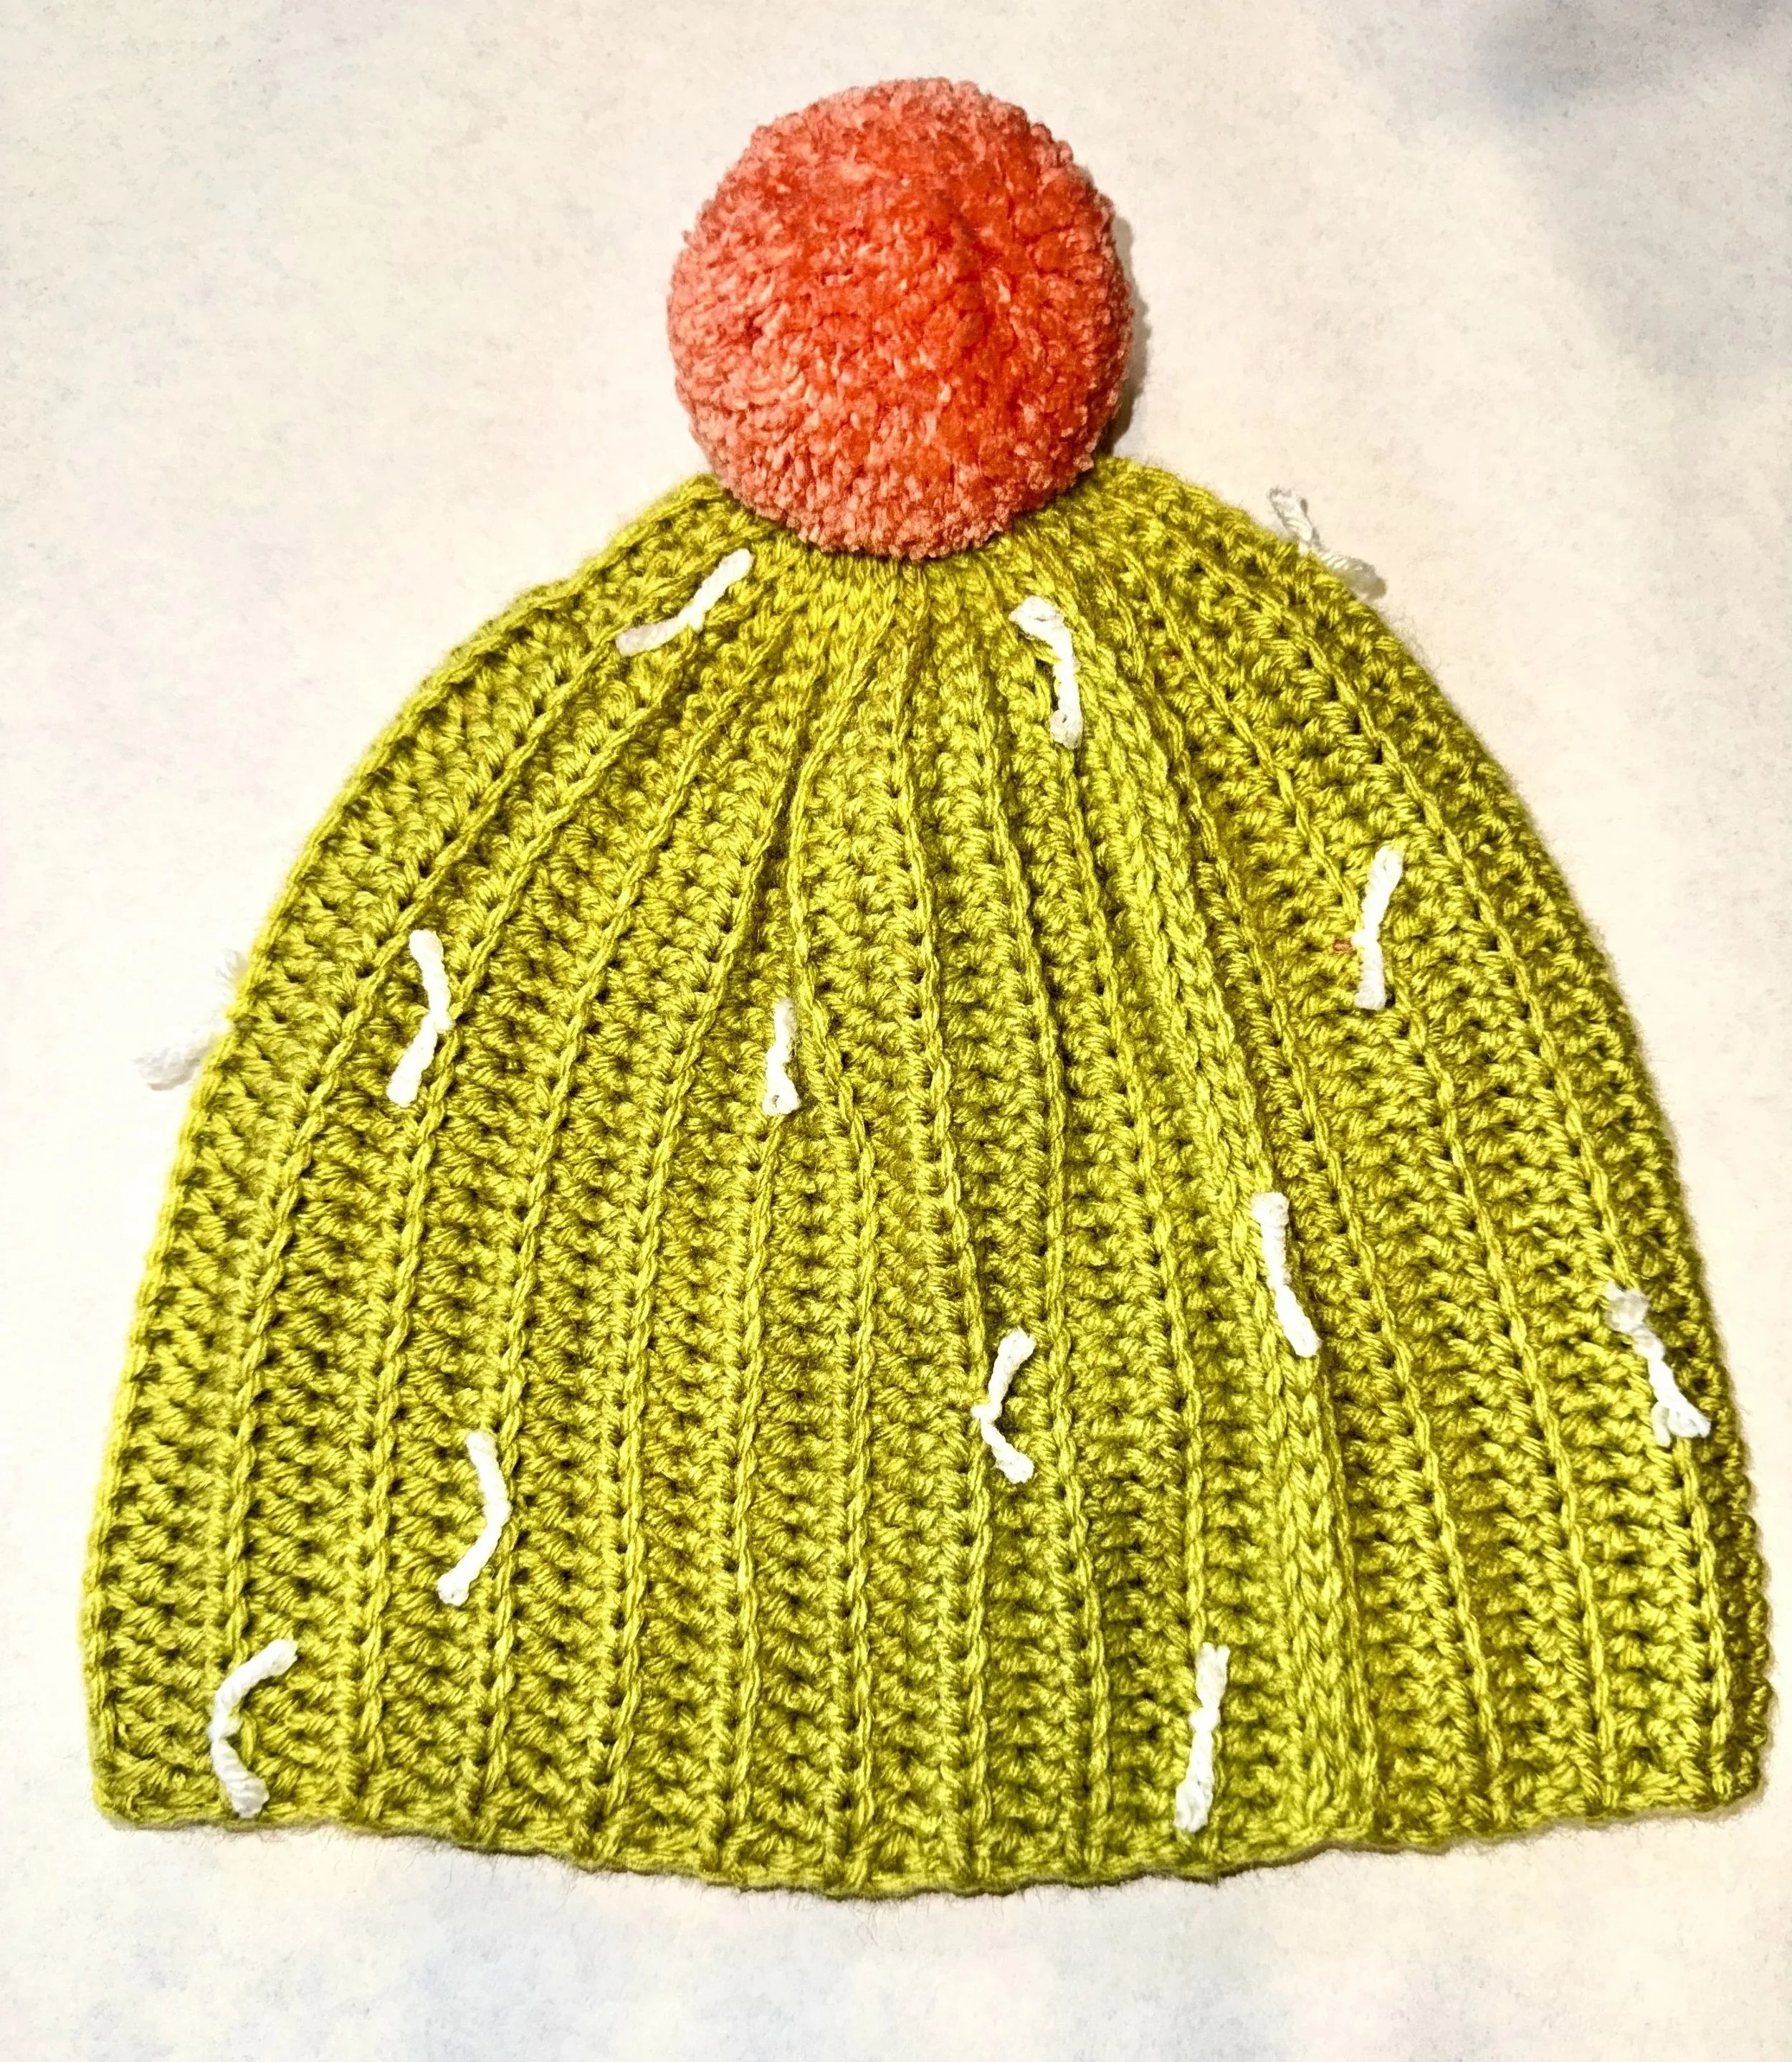
In this pattern, I am going to be teaching you how to make a cactus hat. This is one of my favorite base hat patterns because it is so simple and so versatile. I’m sure you can see that I have a love for unique hats, but every unique hat starts with a common base. There are a few “Base” hats which I use. A HDC Beanie that I work in the round, a DC beanie (also in the round), and ribbed cap which is actually worked vertically back and forth instead of in the round. The key to this hat is using smaller stitches towards the top of the hat; Otherwise, you end up with a thick bump on the very top. I will show you how to execute this method in this tutorial.
As always, I would love to see your finished products! Post your photos in the comments or on social media and be sure to tag me!
Pinterest @The_Productive_Peach
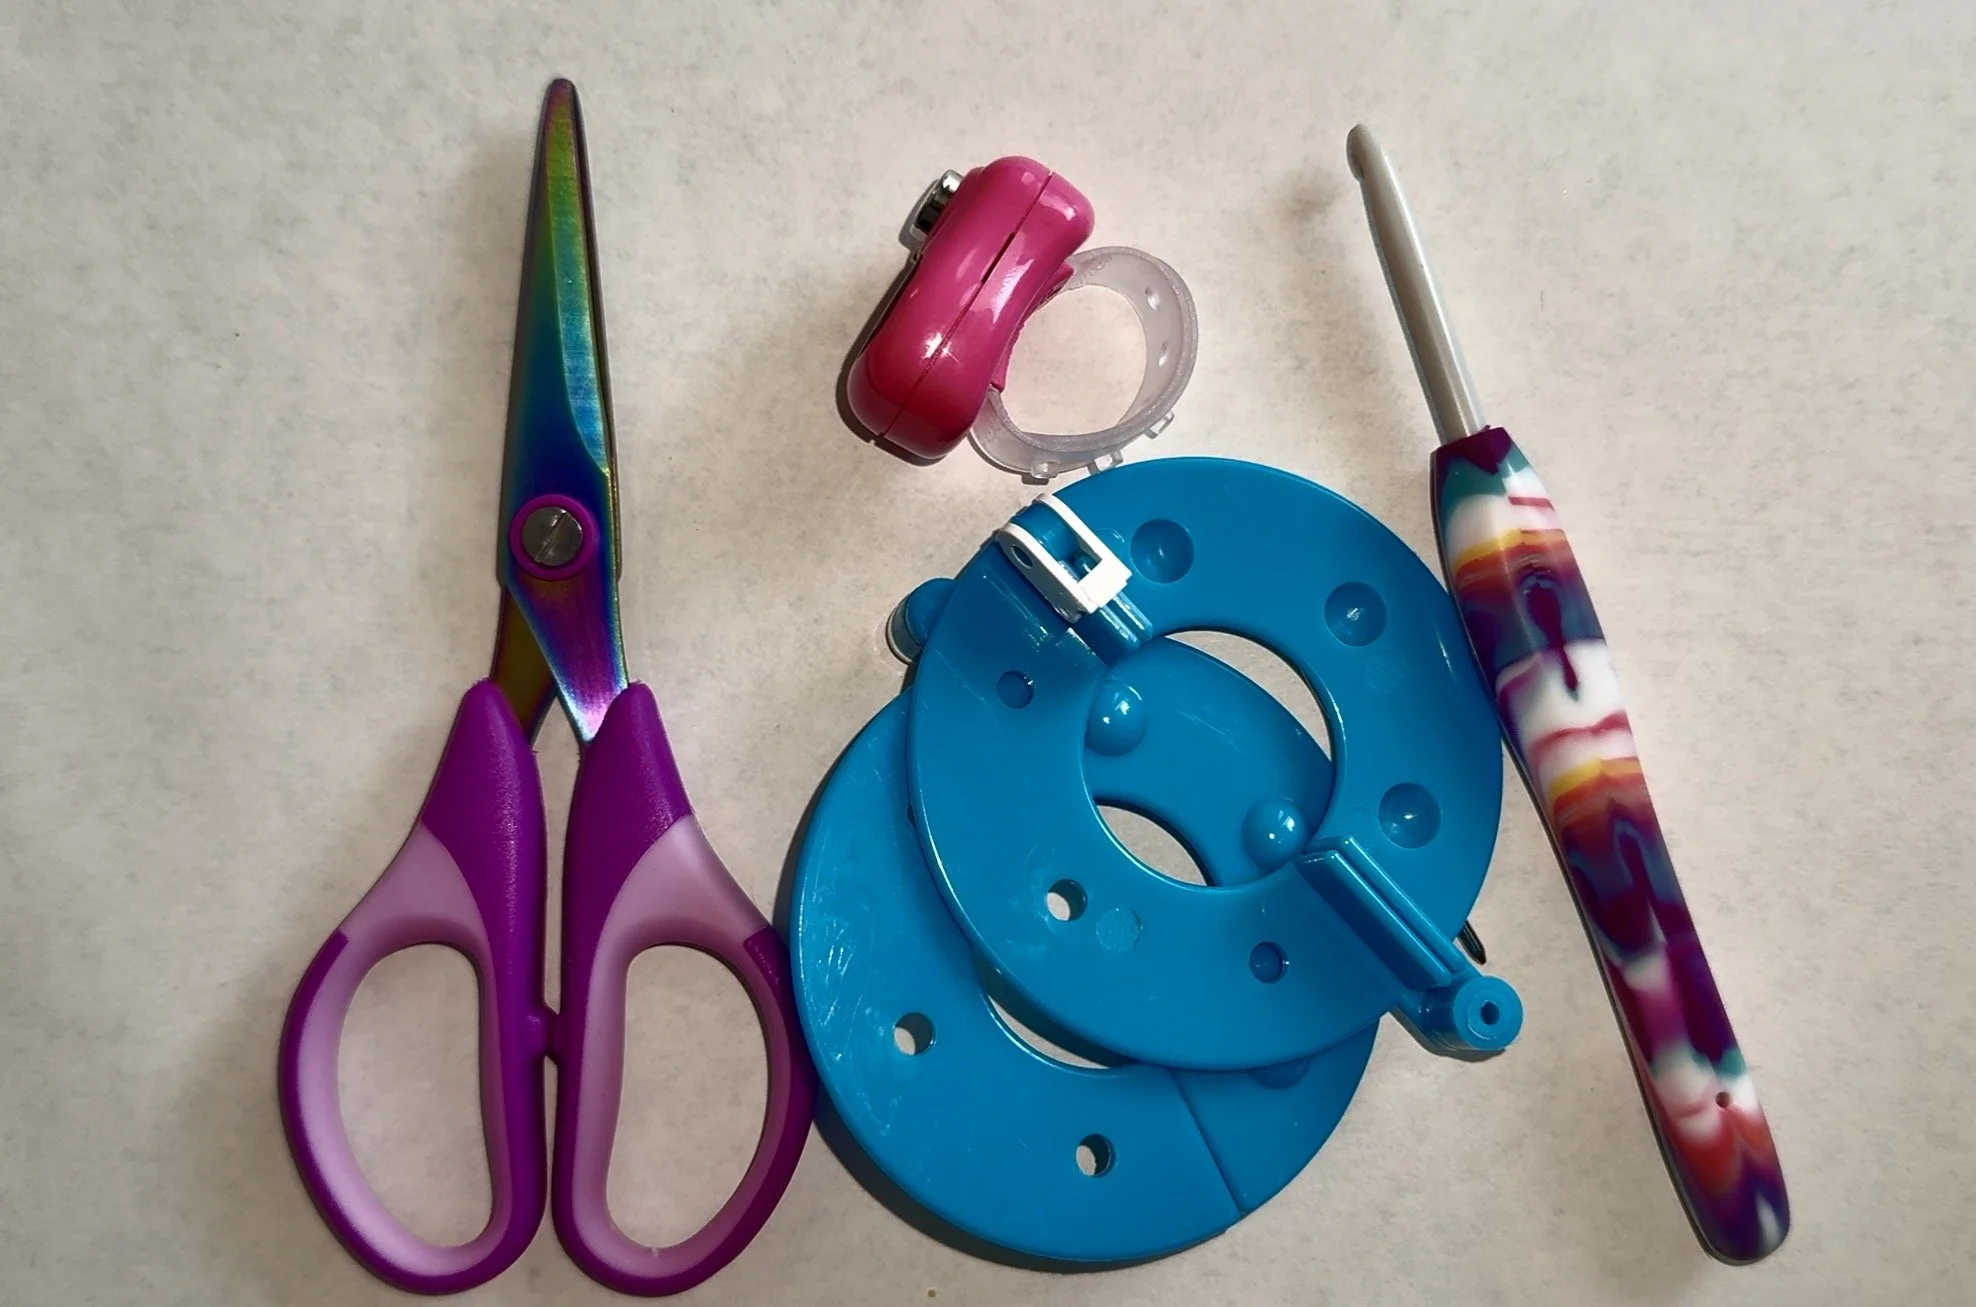
Materials
5.00 MM Crochet Hook
Tapestry Needle
PomPom Maker
Scissors
Stitch Markers (Optional)
Row Counter (Optional)
Tape Measure
3 Tones of yarn
1 color for the Cactus (Cap)
I used Loops and Threads Impeccable line in the color “Grass”
1 color for the Flower (PomPom)
I used Loops and Threads Impeccable line in the color “Peach Pink”
1 color for the Spines (Details)
I used Loops and Threads Impeccable line in the color “White”
Stitches (U.S. Terminology)
Ch - Chain
St - Stitch
Sl St - Slip Stitch
SC - Single Crochet
HDC - Half Double Crochet
BLO - Back Loop Only
LP - Loop
Size Guide
For this pattern, I made a large hat for 23 inch head circumference. The length of the hat before stitching the two ends together was about 21 inches. I made it a little shorter because the type of stitch we are using to create the ribbing effect will allow the cap to stretch. This is also an easy pattern to adjust for size and customize it completely to your own measurements.
To do so, use a measuring tape to measure your head, and you are going to crochet the hat to measure a length of two lunches less than the circumference of your head.
You can also adjust the length of the hat based on how many initial chains you create. Just ensure that you use an even number, and keep the 10 stitches at the top of the hat the same no matter the length.
Pattern
Ribbed Cap
For this portion of the hat, you will need the yarn you have chosen for the cactus portion of your hat, 5.00MM crochet hook, tapestry needle, scissors, stitch markers, row counter. I use the row counter as I am going, to keep track of how many rows I have done, but this is not required.
Foundation: Ch 44 + 2 - 46 St’s total
Row 1: 1 HDC in 3rd Ch from hook, HDC in the next 33 St’s, SC in the next 5 St’s, Sl St in the remaining 5 St’s - 44 St’s total
Row 2: Turn, (We will not being chaining on even rows), After turning Sl St in BLO of the same stitch you just Sl St’d in for the previous round, Sl St in BLO of the next 4 St’s, SC in BLO of the next 5 St’s, HDC in BLO of the next 33 St’s, HDC in both LP’s of last St- 44 St’s total
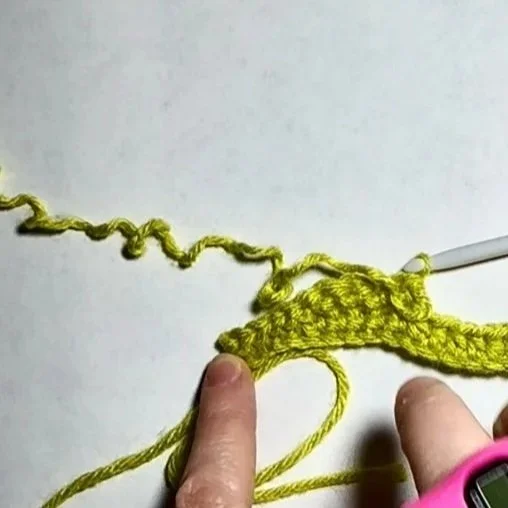
Row 2 - Turn (No Chain)
This is what the beginning of the Row is going to look like after you turn without chaining.
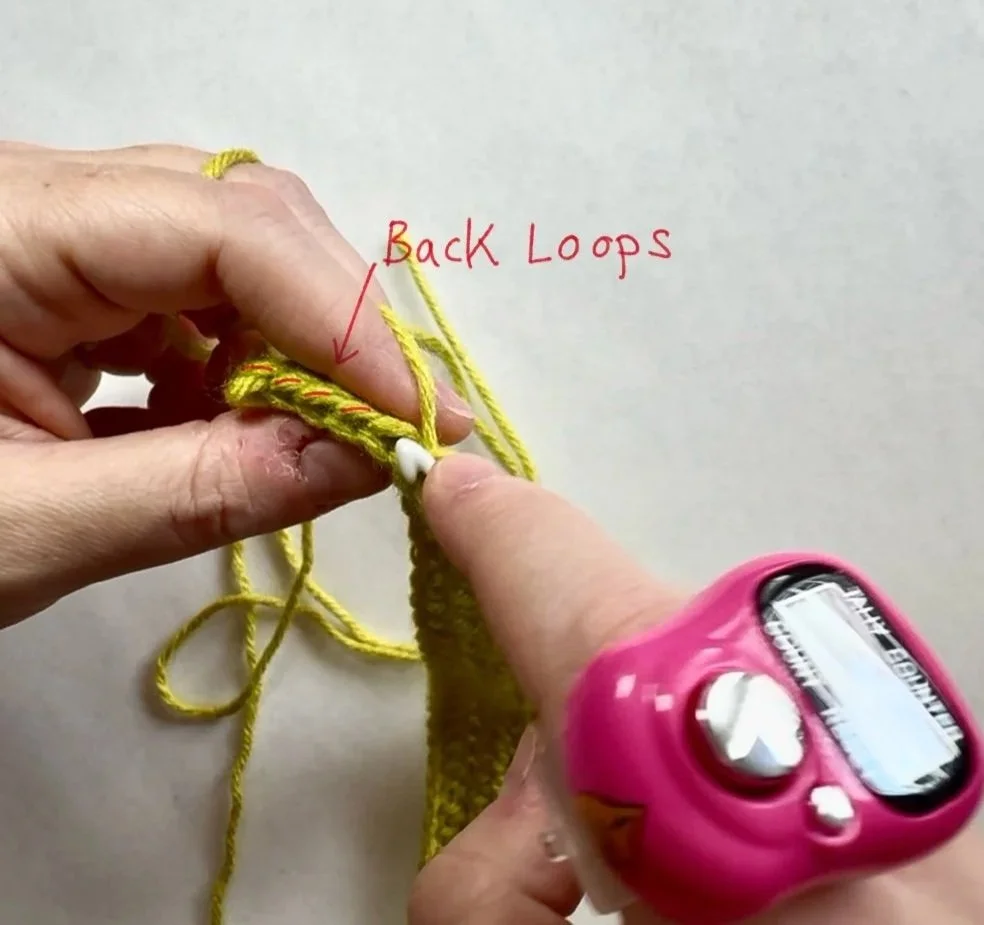
Row 2 - Back Loops
I have indicated what the back loops look like when you are looking down at your project.
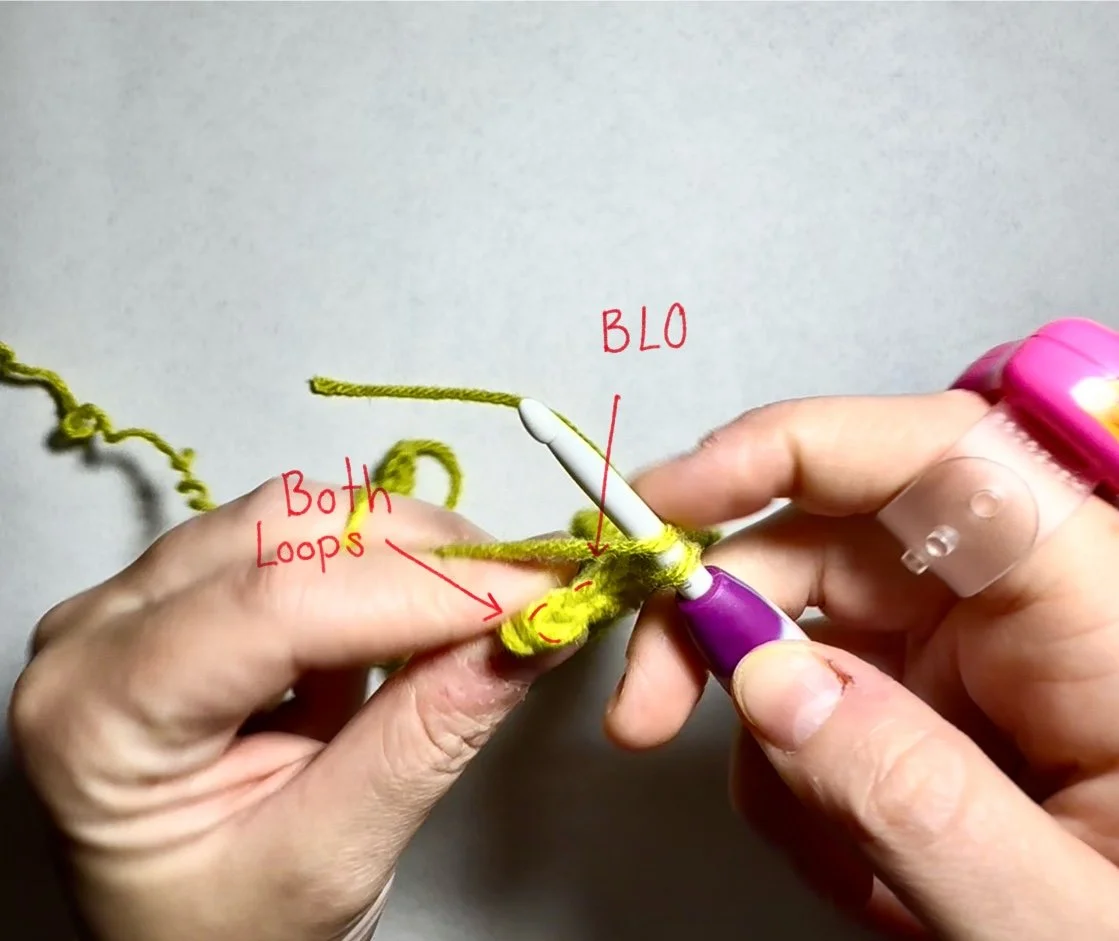
Row 2 - Both Loops Versus Back Loop
I have highlighted the difference between the Back Loop and Both Loops.
Row 3: Turn, Ch1, HDC in Both LP’s of the first St, HDC in BLO of the next 33 St’s, SC in BLO of the next 5 ST’s, Sl St’s in BLO of the remaining 5 St’s of the row - 44 St’s total
Row 4 - end: Continue to alternate repeating Row 2 and Row 3 until you have the desired length of your hat, just ensure that you end on an even row
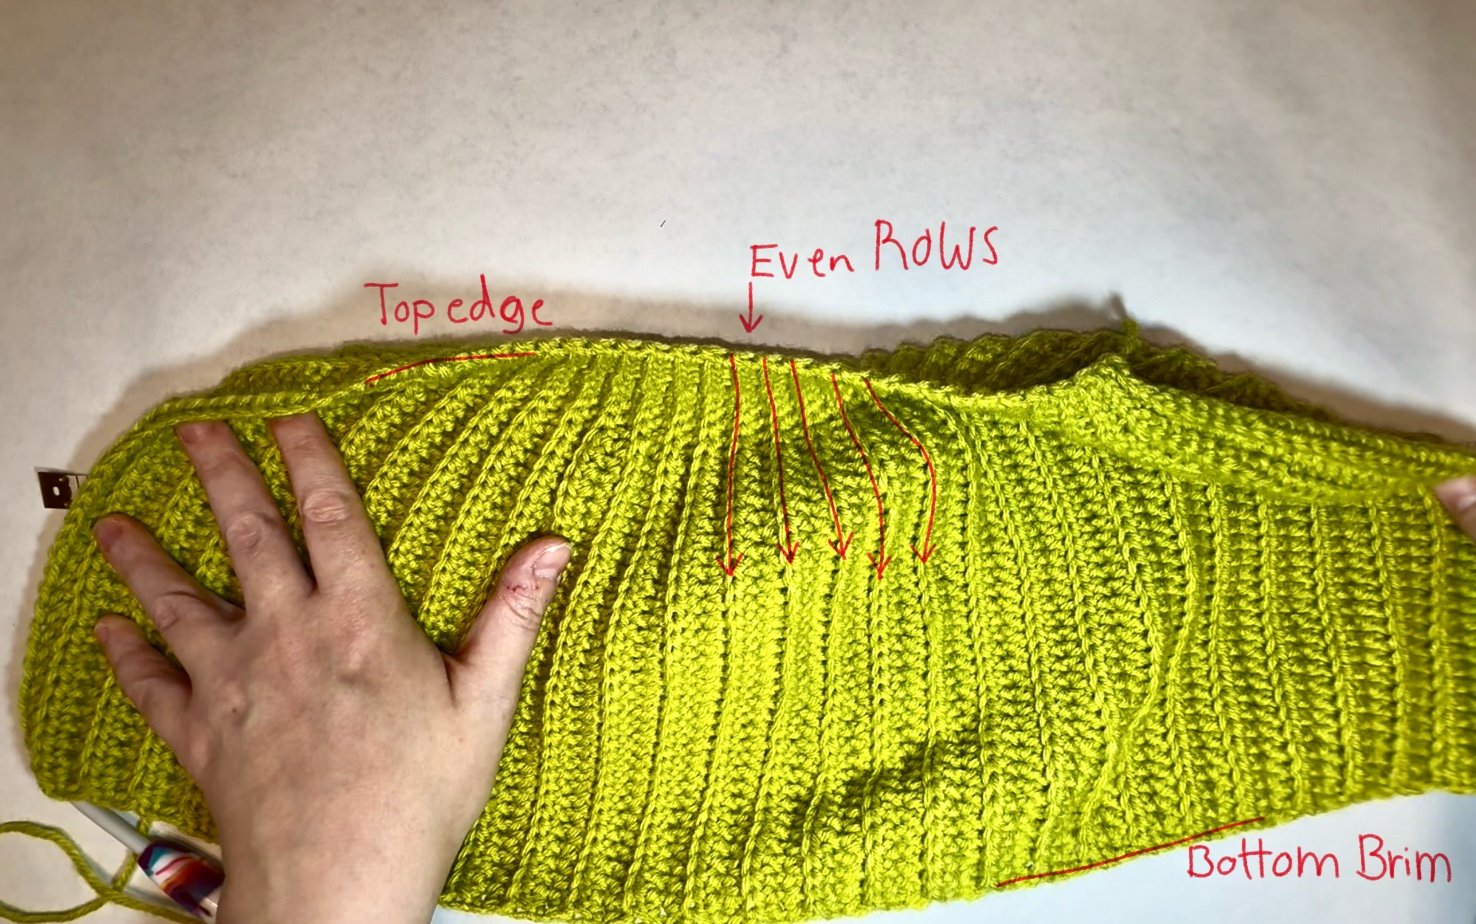
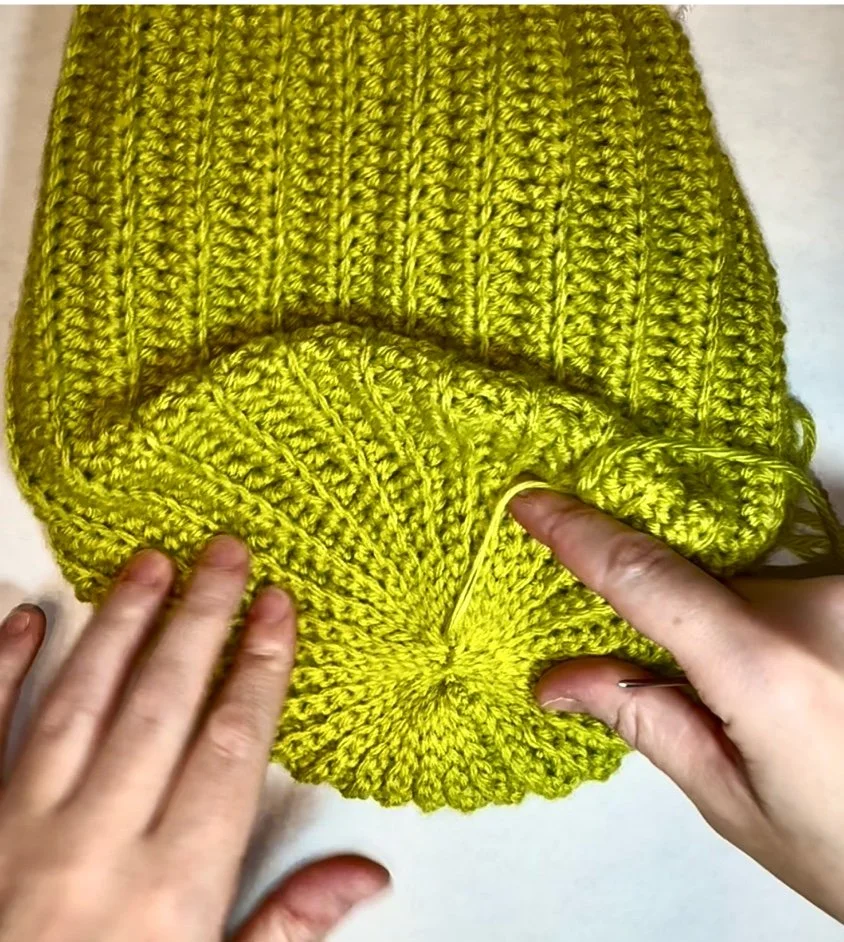
Row 4 - End
This is what your hat will look like before you begin sewing your two ends together.
Sewing
This is where we will connect the two ends of the hat. I recommend using stitch markers at the top and bottom corners of the hat, and two or three more in the middle. Doing this will help you ensure the two ends will stay aligned as you stitch them together.
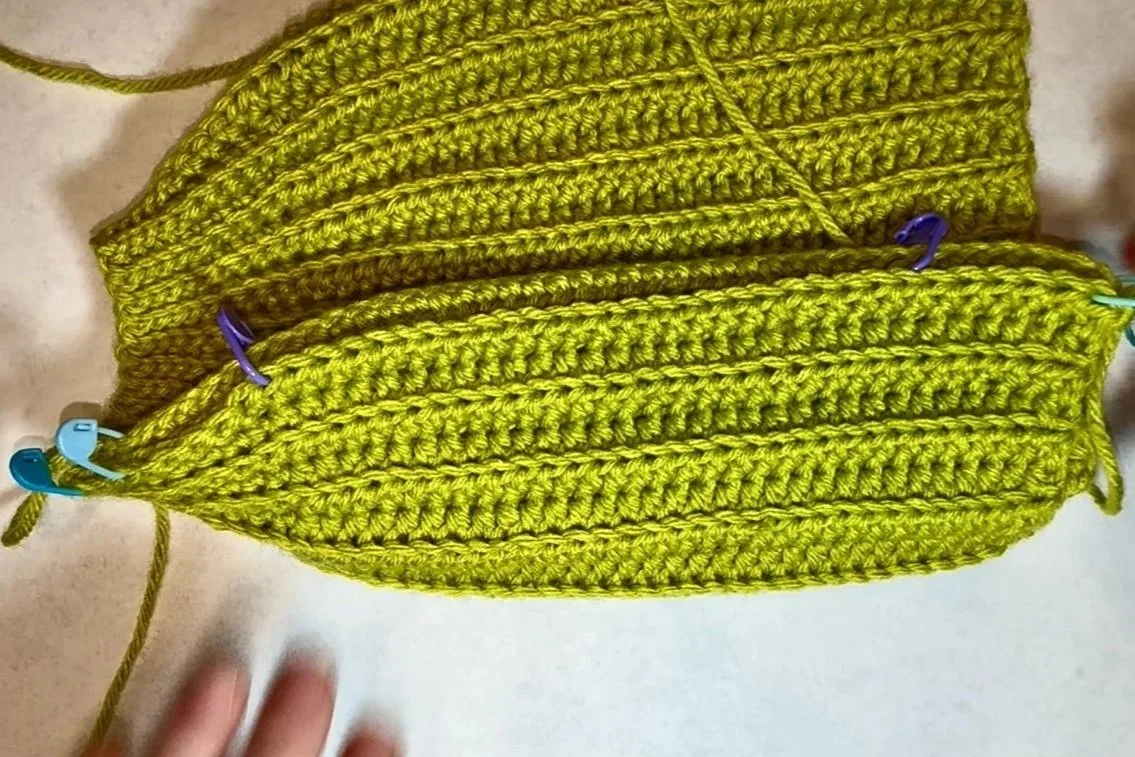
Finishing - Clipping the Edges Together
This is where I placed my stitch markers to hold the two edges in place
Step 1: Once you have the two ends lined up, you will Sl St through all 44 St’s of both ends of the hat, you should end up at the top of the hat.
Step 2: Cut a long tail (this will be used to close the top of the hat), fasten off
Step 3: Turn the Hat inside out, weave in the shorter tail, cut off the excess
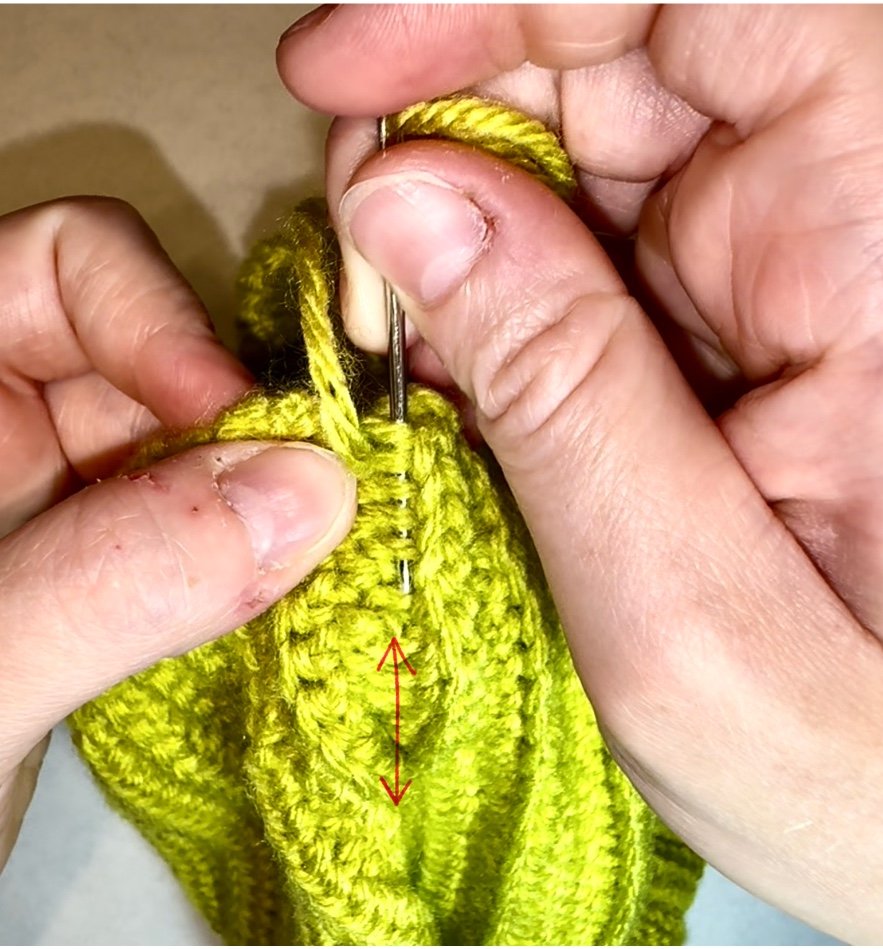
Step 3 - Weaving Tails
You want to weave your ends in vertically so they will not be visible.
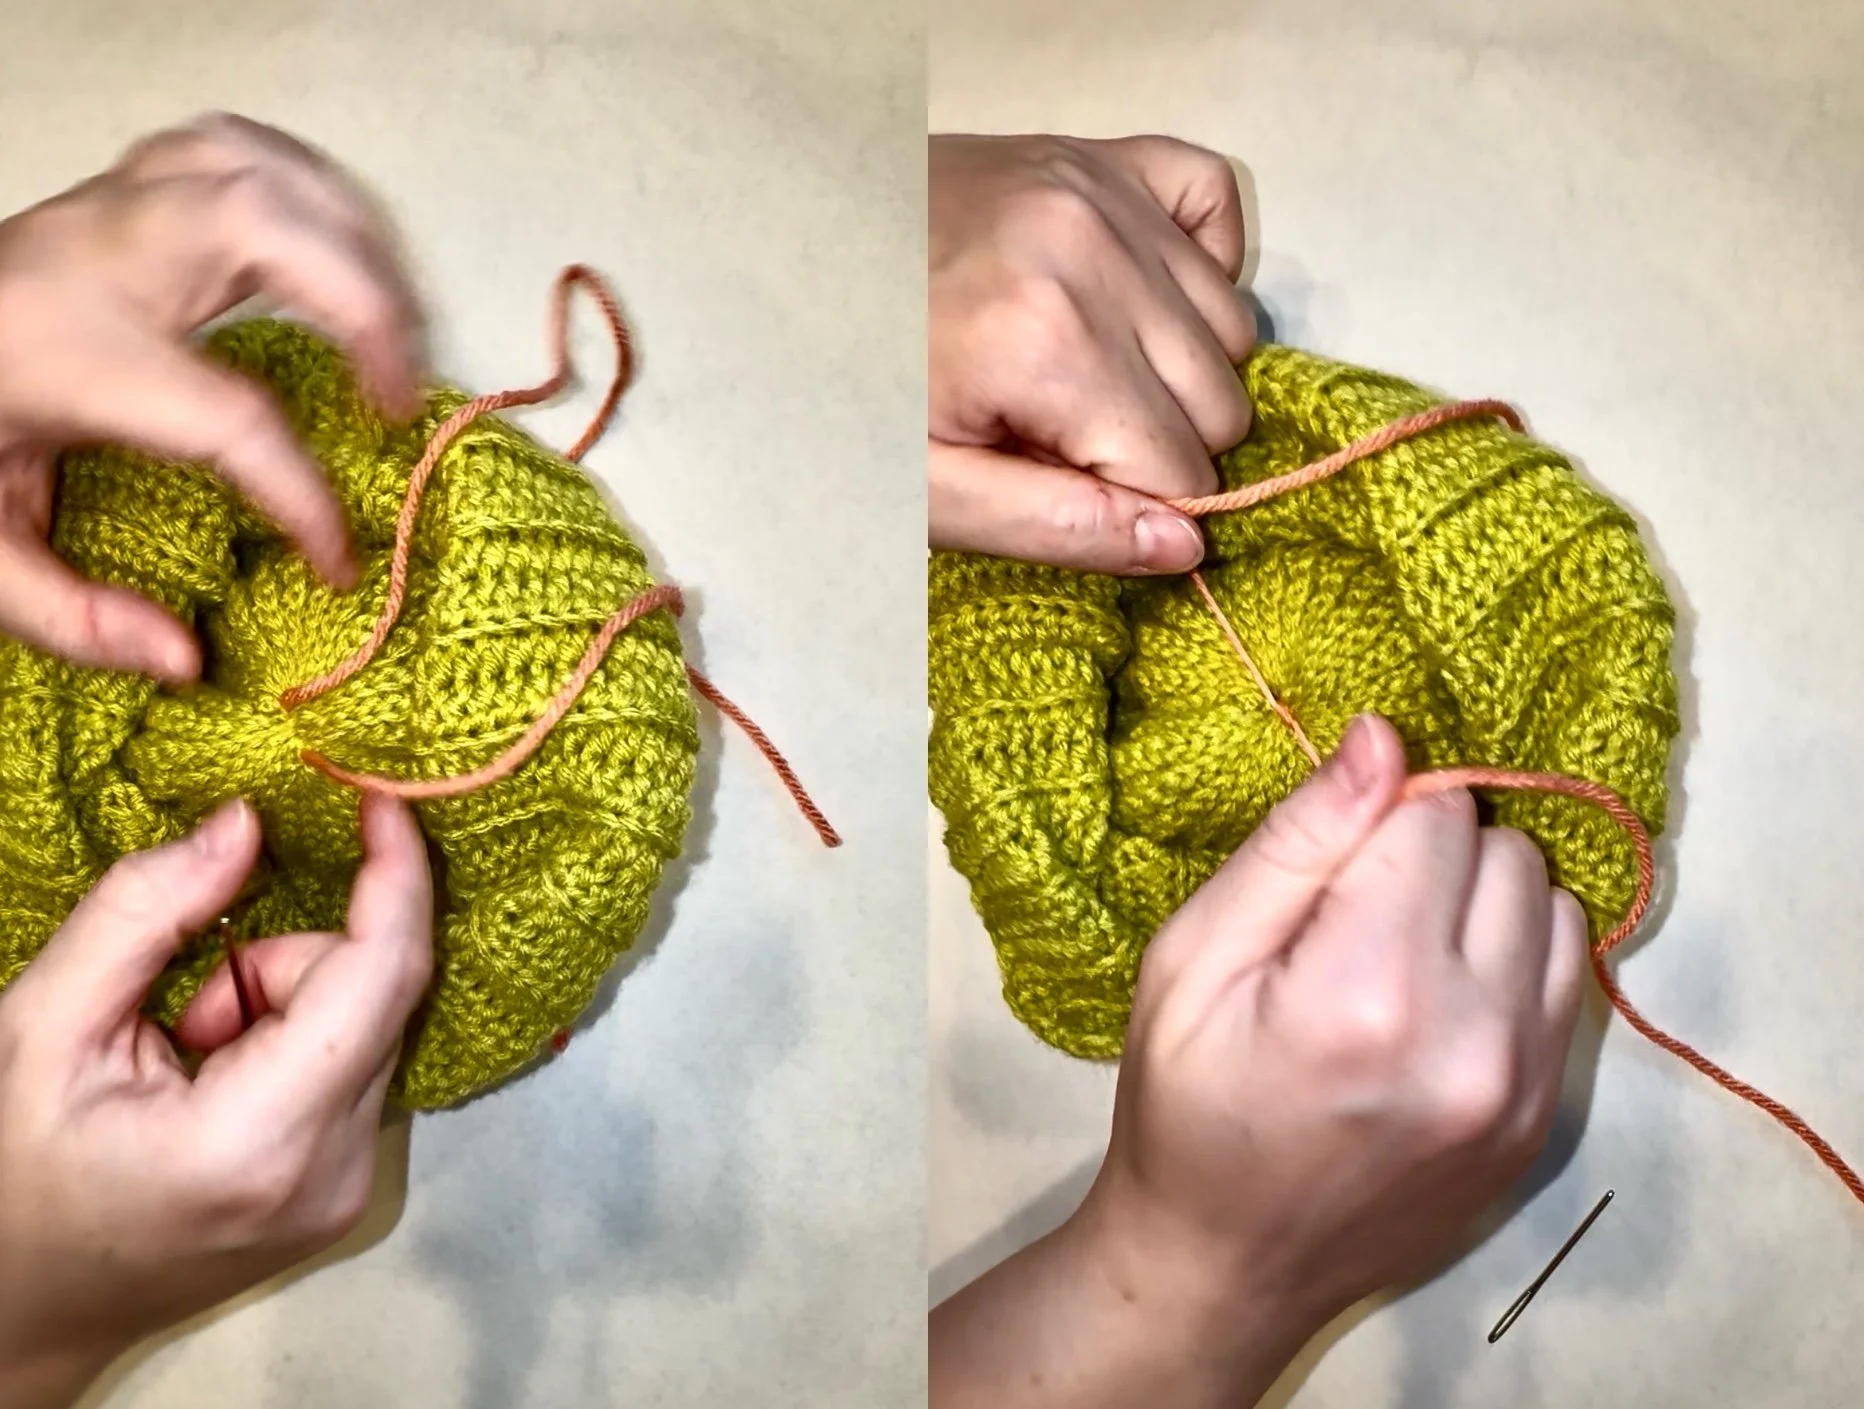
Step 4: Use the remaining tail to weave in and out of the top edge of the hat
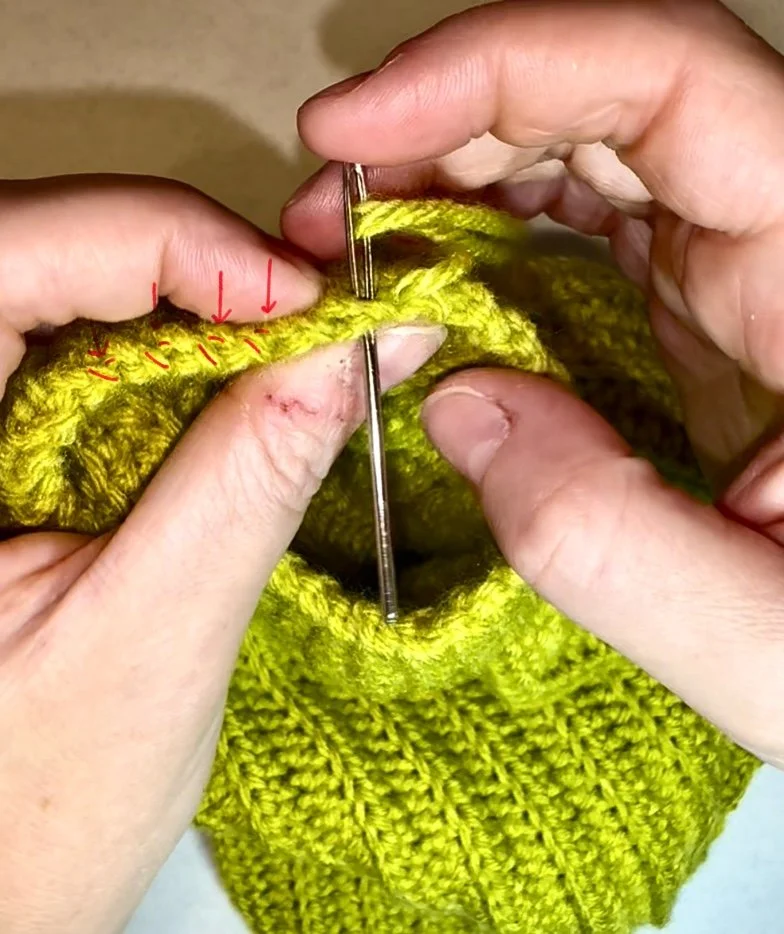
Step 4 - Closing the Top
I have indicated the stitches you will go through when you are sending your needle into the circle.
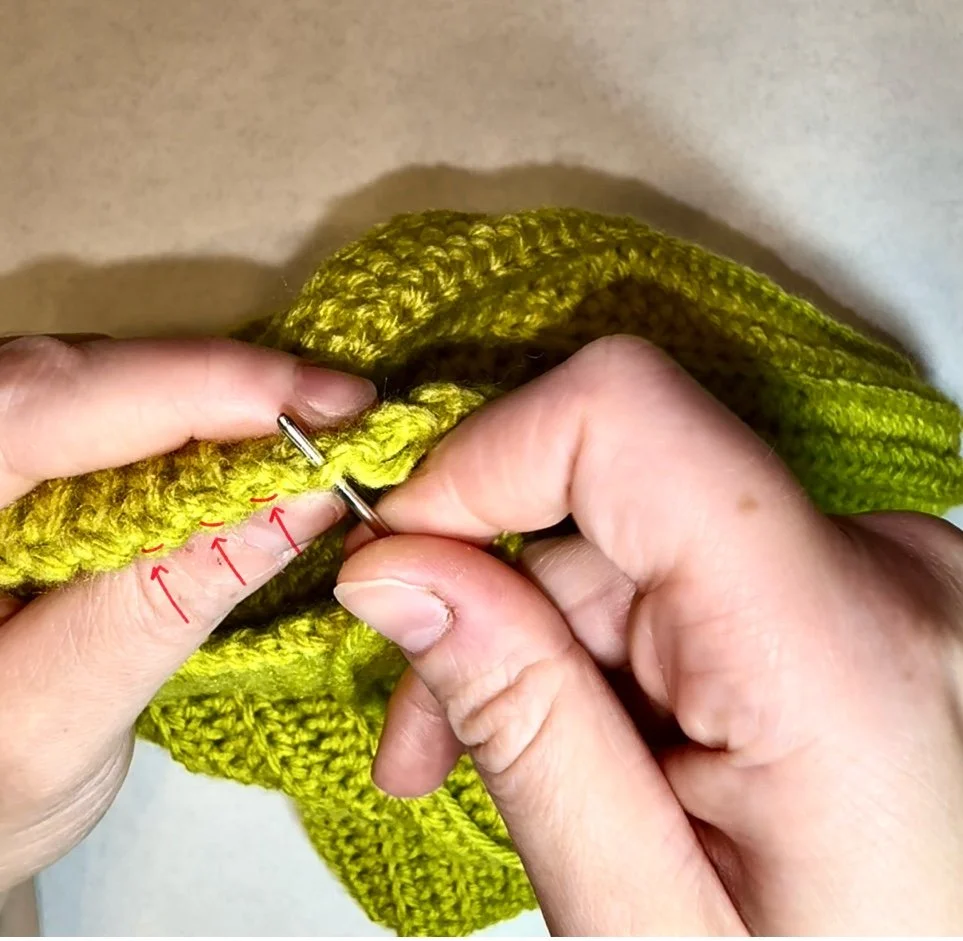
Step 4 - Closing the Top
I have indicated the stitches you will go through when you are sending your needle out of the circle.
Step 5: Once you have that tail weaved all around the top, you will pull it tight which is going to “Close” the top of the hat. (Depending on the size of the hat, there will most likely still be a small gap)
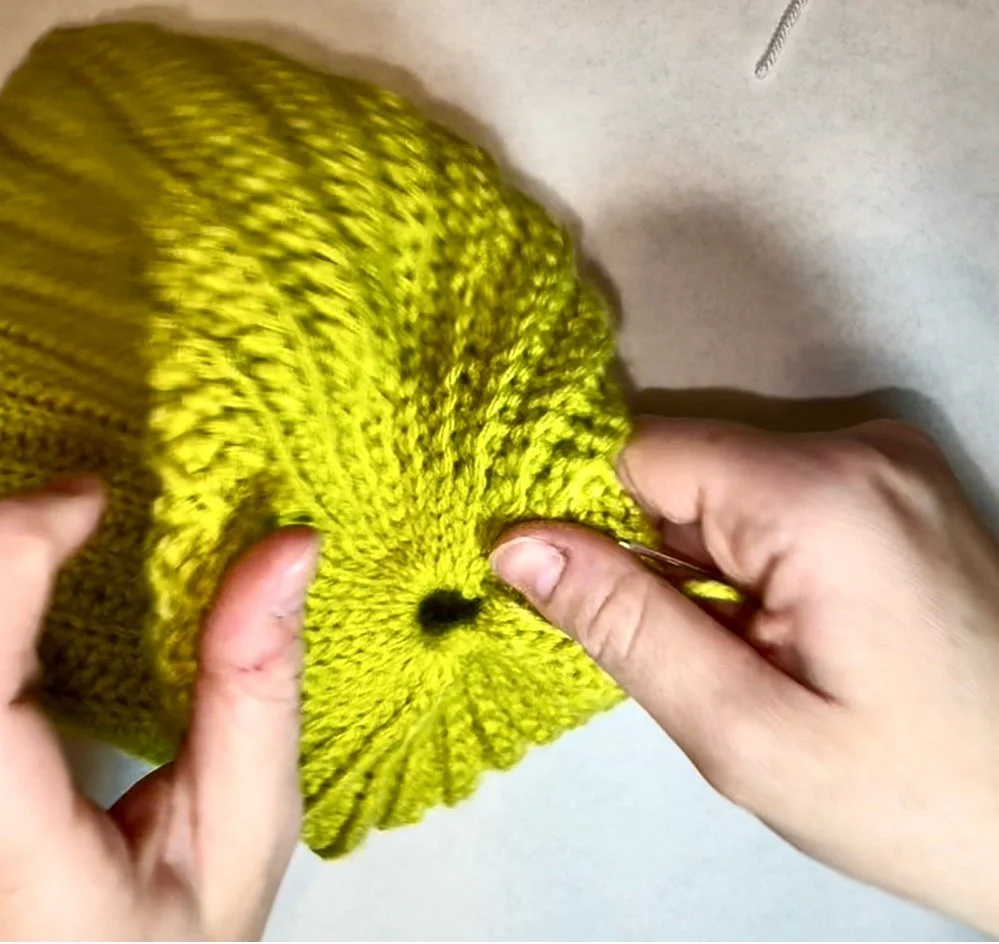
Step 5 - Closing the Top
This is what the top may look like when the tail is pulled as tight as it can be pulled.
Step 6: Pull the tail as tight as you can, and make a sewing knot to ensure the top does not loosen as you are closing it the rest of the way.
Step 7: Pinch the top hole so two ends are touching and weave the tail back and forth between the two sides from one end to the other. This should close the remaining gap.

Step 7 - Closing the top
This what the top is going to look like when you pinch the two sides together.

Step 7 - Closing the Top
You will lace the yarn back and forth across the hole.
Step 7 - Closing the Top
This is what the top will look like from the inside once it is completely closed.
Step 8: make another sewing knot to keep to ensure what you just weaved in remains tight.
Step 9: weave in the remainder of the tail and then cut off the excess
PomPom
For this next portion, you are going to need the color of yarn you have chosen for the flower, pompom maker, and scissors.
Step 1: Wrap your yarn around the pom pom maker until both sides are full, but it can still close

Step 1 - Wrapping the Yarn
This is how you are going to hold the PomPom maker as you begin wrapping the yarn around it.
Step 2: Close the pom pom maker
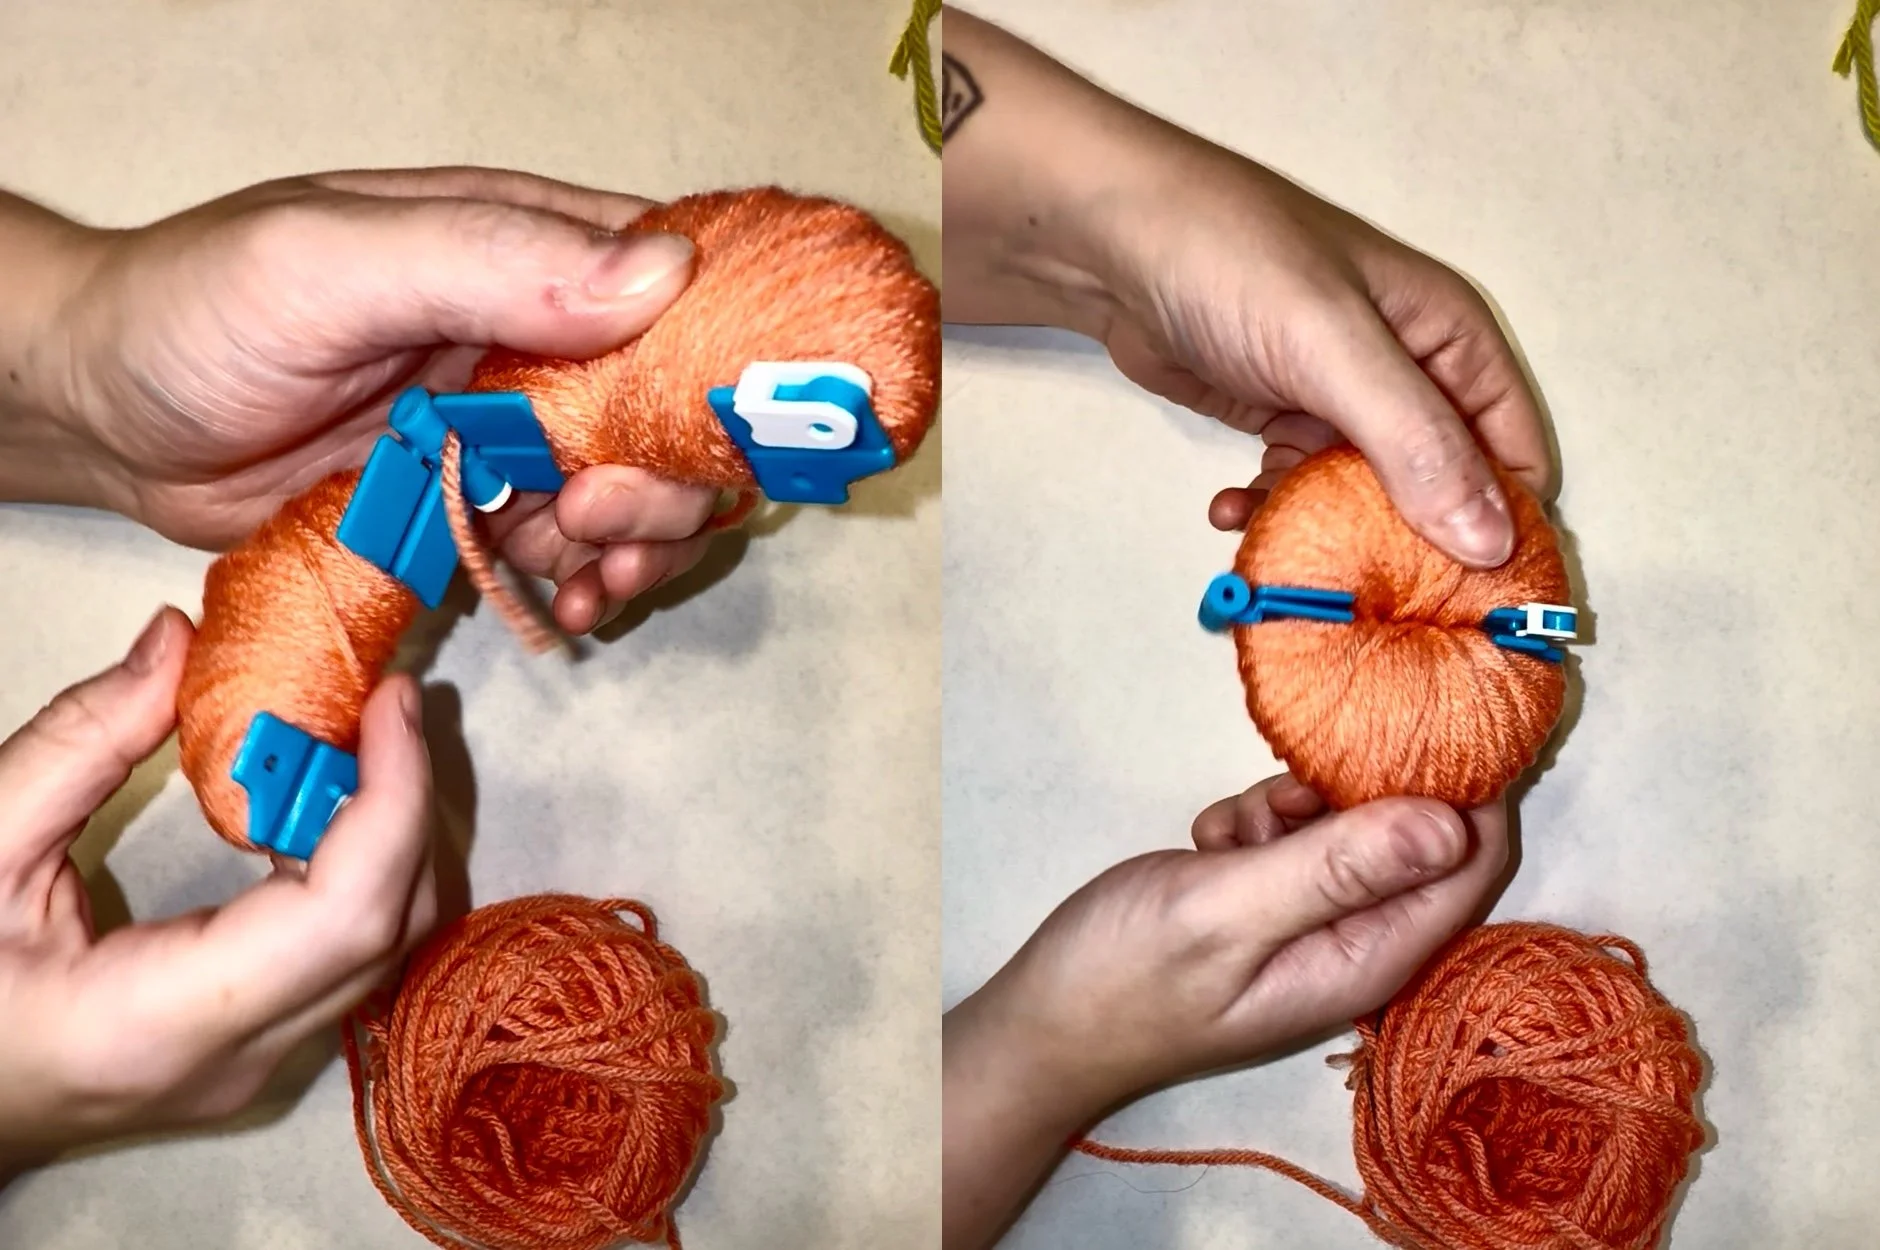
Step 2 - Closing the PomPom Maker
I have wrapped the yarn around the Pom Pom maker so it is flush with the edges of each side. This way the yarn on both sides touches, but the PomPom maker is still able to close.
Step 3: Snip the tail
Step 4: Cut a long piece of the same color yarn
Step 5: cut around the circle

Step 5 - Cutting the yarn
Here I am cutting the yarn all along the edge of the gap we are going to use to tie all the pieces together.
Step 6: Use the gap of the pom pom maker to tie all of the cut yarn together with the long piece of yarn you just cut
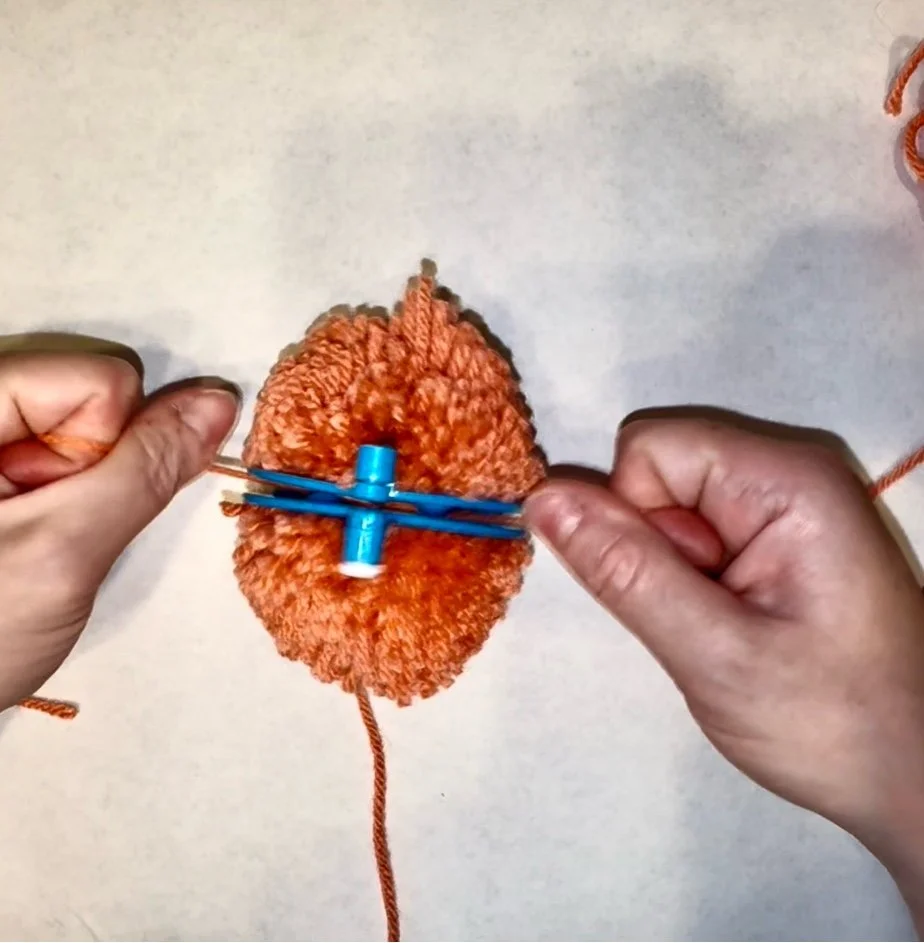
Step 6 - Tying the PomPom
This is the Gap you are going slip your long piece of yarn into to pie the PomPom together
Step 7: Remove the pom pom maker
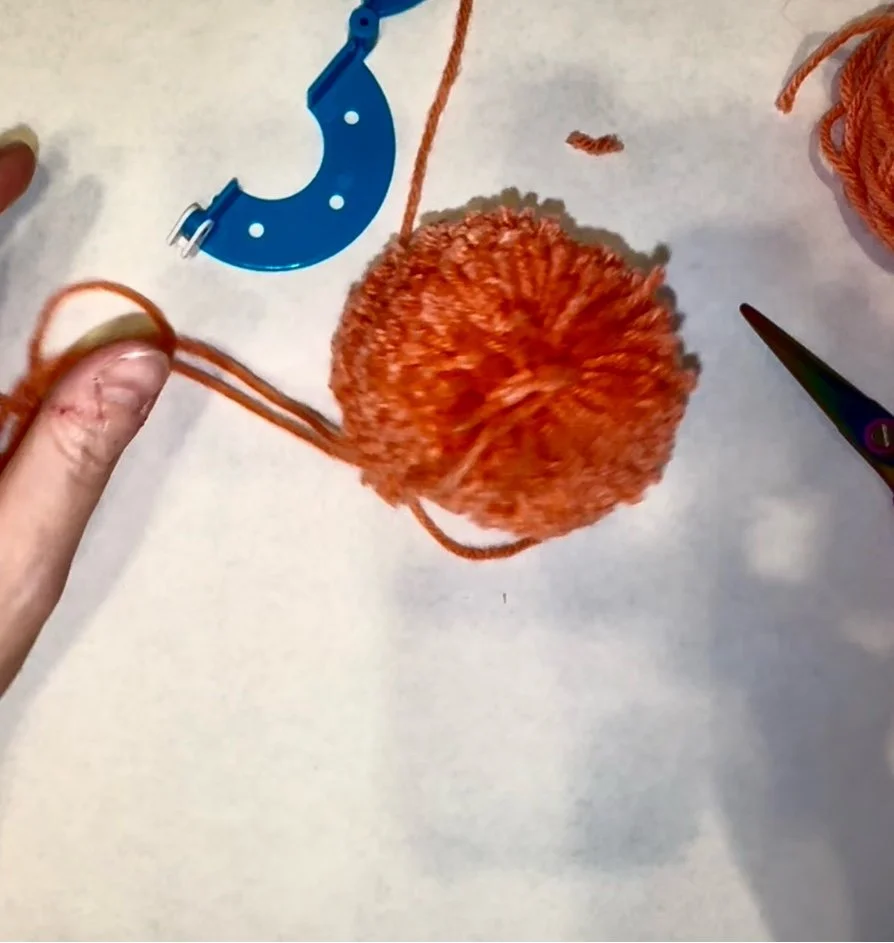
Step 7 - PomPom Before Trimming
This is what your PomPom is going to look like once you remove it from the PomPom maker, and before you begin trimming.
Step 8: Trim until the yarn ball makes a uniform circle (Do NOT cut the two long pieces that tied the ball together, this is what we will use to attach the pompom to the top of the hat)
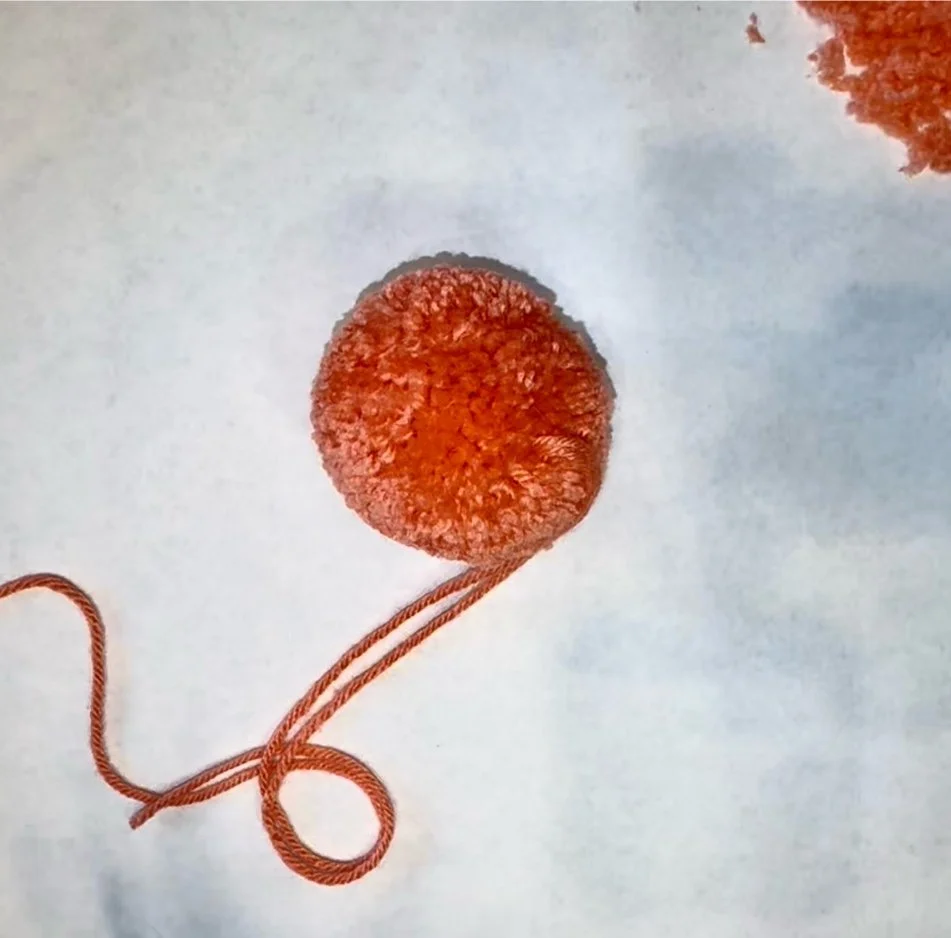
Step 8 - Finished PomPom
This is what your Pom Pom will look like once it’s complete.
Step 9: use your tapestry needle to send both tails of the pom pom through the top of the hat on opposite sides if the hole we pinched together and closed earlier
Step 10: Tie a knot with those two ends, repeat one time
Steps 9 & 10 - Attaching the PomPom
You can see where I pulled the two ends of the Pom Pom through to tie them together.
Step 11: weave in each end on opposite sides of the hat. Details
Details
For this last portion, you will need the color of yarn you have chosen for your spines, 5.00MM Crochet hook, and scissors.
Step 1: Cut 15, 5 inch pieces of yarn
Step 2: Take one of those pieces and use your hook to pull one end through the hat so it weaves under a stitch and back out on the other side
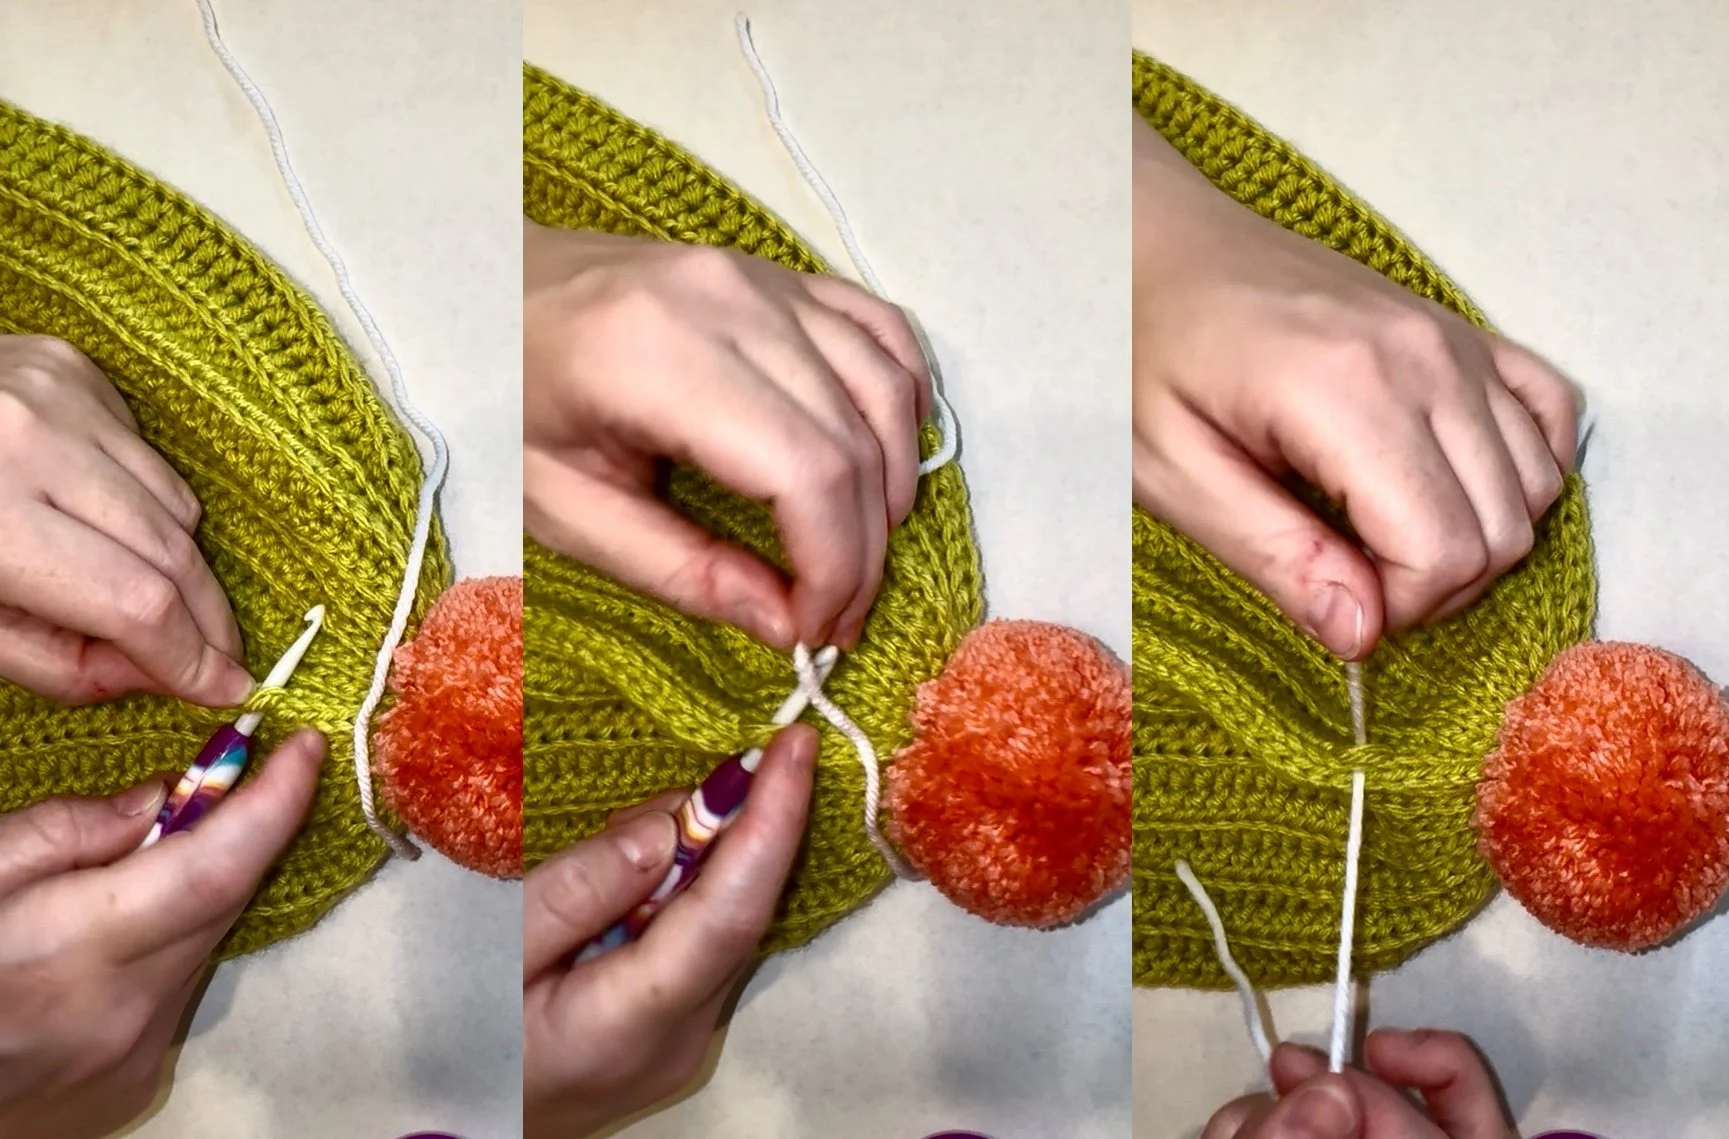
Step 1 & 2 - Pulling the Yarn through
Here is an example of where/how I am inserting my hook and pulling the yarn through.
Step 3: tie a knot with those two ends, repeat one time
Step 4: cut both ends down to about 3 CM each
Step 5 - 28: Continue to alternate repeating steps 3 and 4
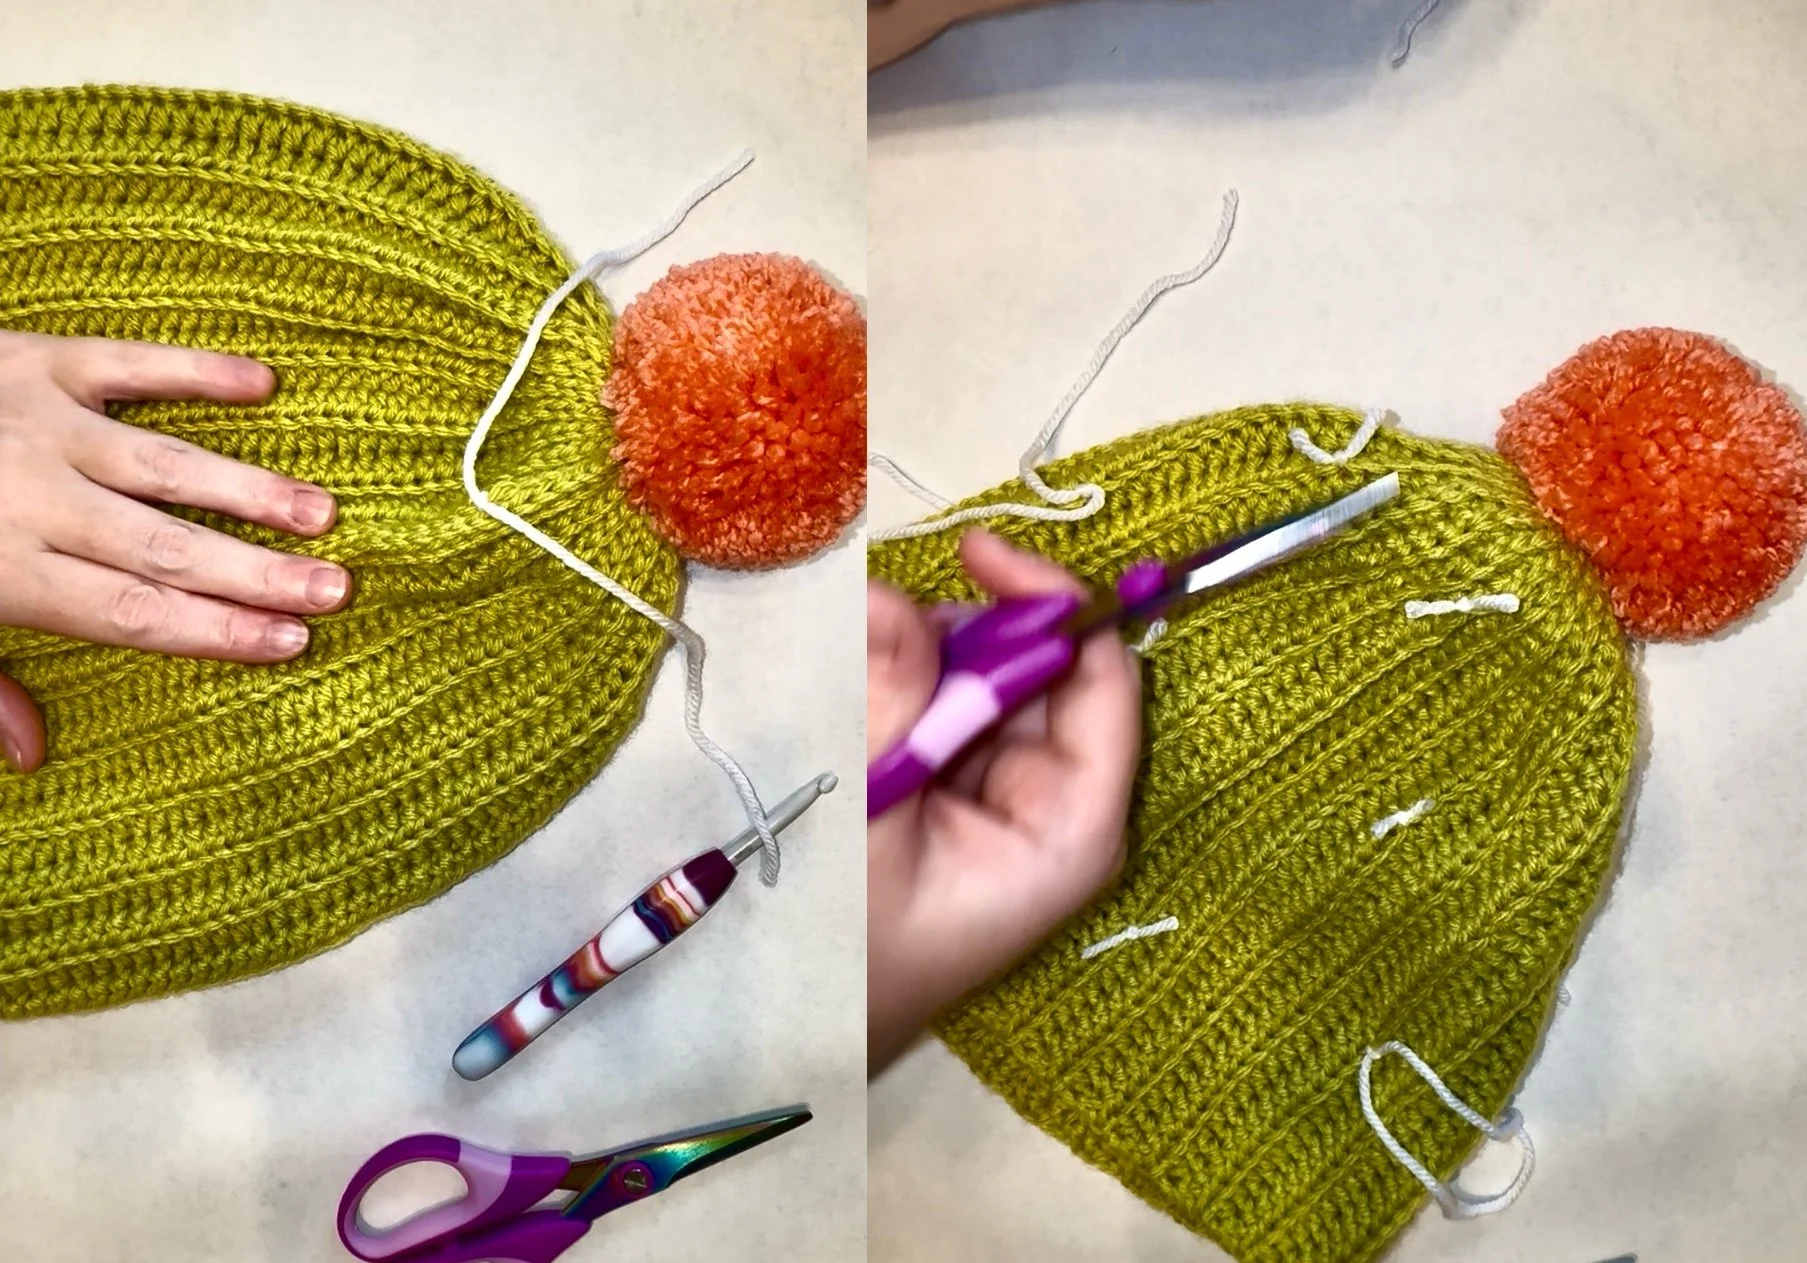
Steps 3 & 4 -Tying and Cutting the Spines
Here you can see that I have sporadically attached spines all around the hat, and cut them short.
Step 29: Admire your beautiful new hat