Single Crochet
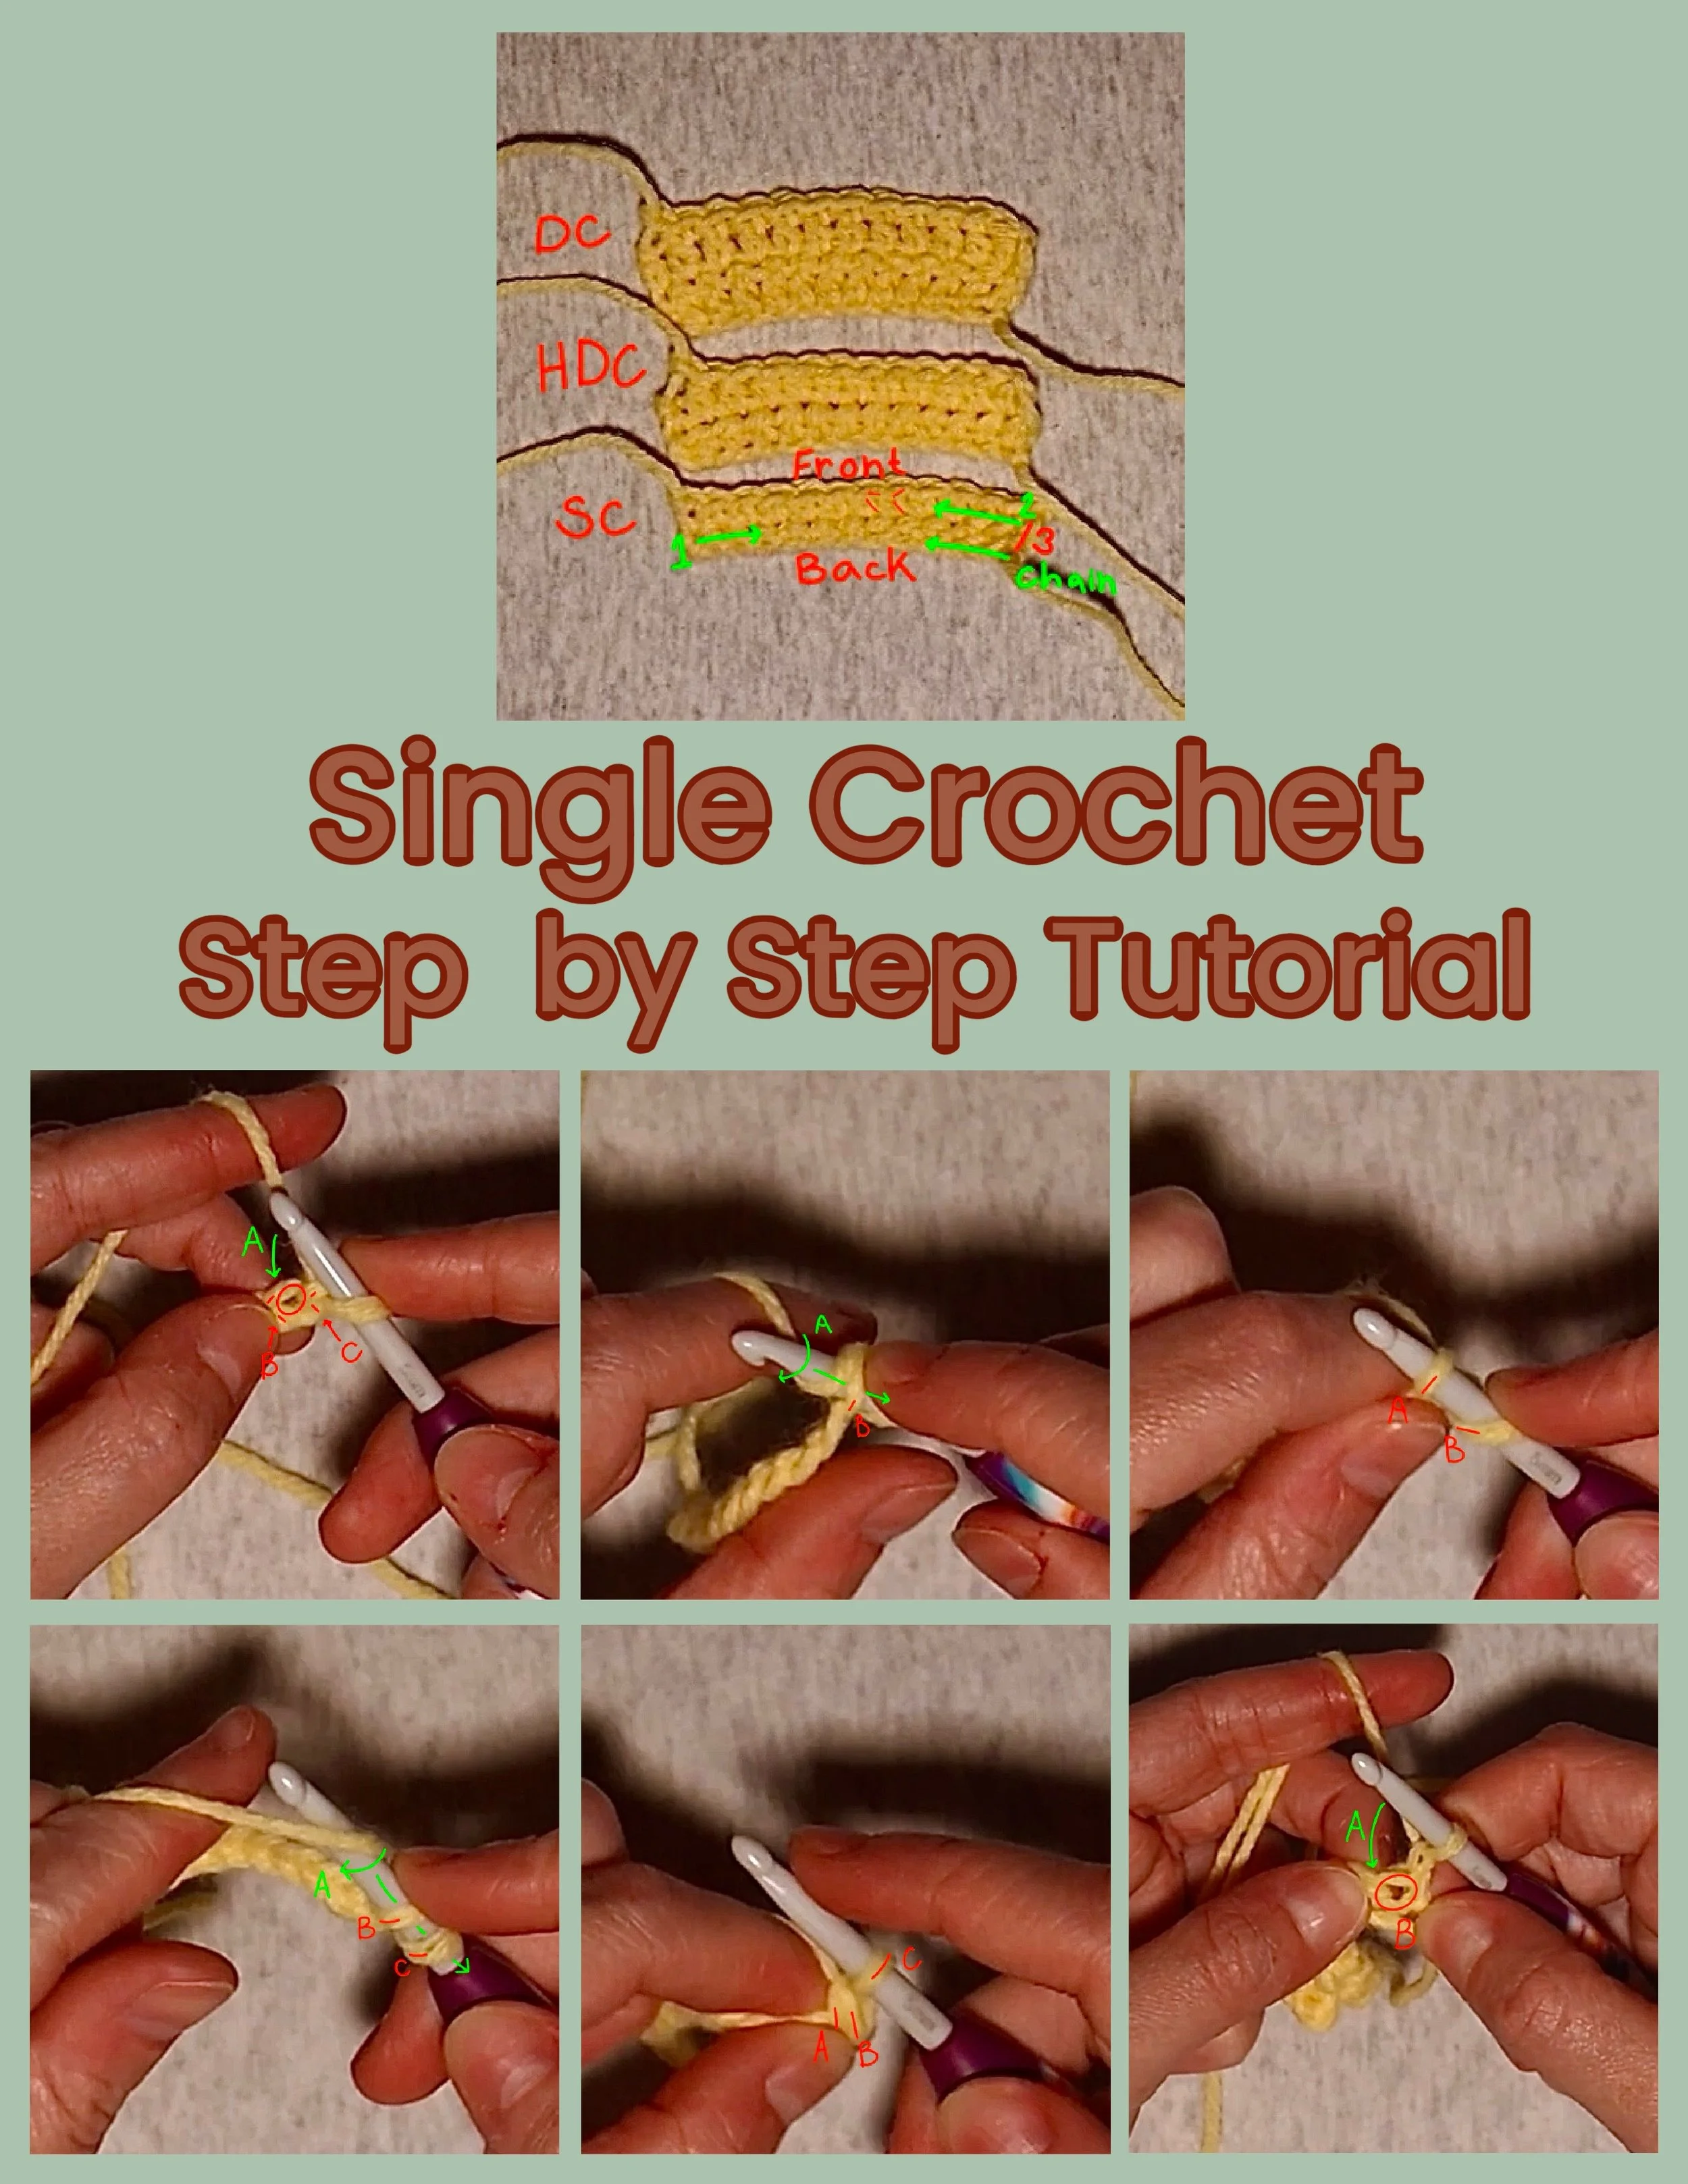
How do I make a Single Crochet? Great Question! I have compiled and illustrated over some photos of my own work to show you exactly what to do. I have also provided commentary on each photo to explain to you exactly what I’m doing and why. If you prefer to crochet along with me, Check out my video tutorial!
Watch the Video Tutorial Here!
Scroll Below for the Written Instructions.
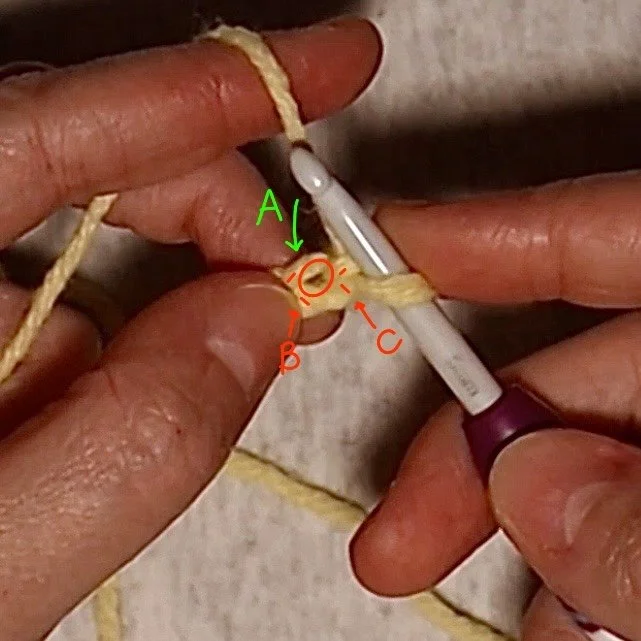
Step 1 - Inserting my Hook
To start this swatch, I am going to chain 12 + 1. Once I have my foundation chain established, I will find the second stitch from my hook.
The reason I chain + 1 is because this additional chain will act as the starting edge of the first row.
I will show you where to place your stitch if you are working in a previous row and not the foundation chain farther below.
Indicated in Step 5.
A - This is the path I will take to place my hook into the second chain from the hook.
B - This is the second chain from my hook.
C - This is the first chain from my hook.
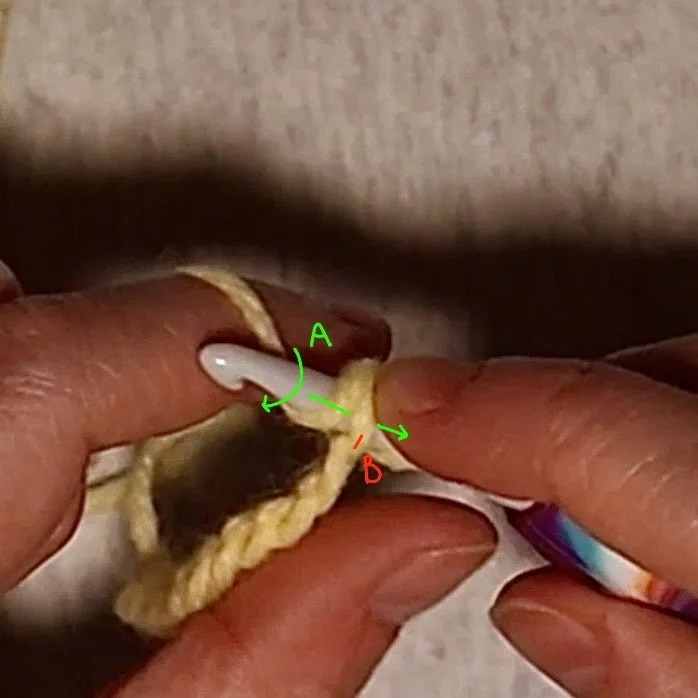
Step 2 - Exiting the Chain - Part A
Once I insert my hook into the chain, I am going to wrap my yarn around my hook, and exit my hook through the chain stitch I initially entered into.
A (First Green Arrow) - This is the path I will take to wrap my working around my hook.
B - This is the chain stitch I initially inserted my hook into.
Second Green Arrow - This is the path I will take to pull my hook and working yarn through the chain stitch.
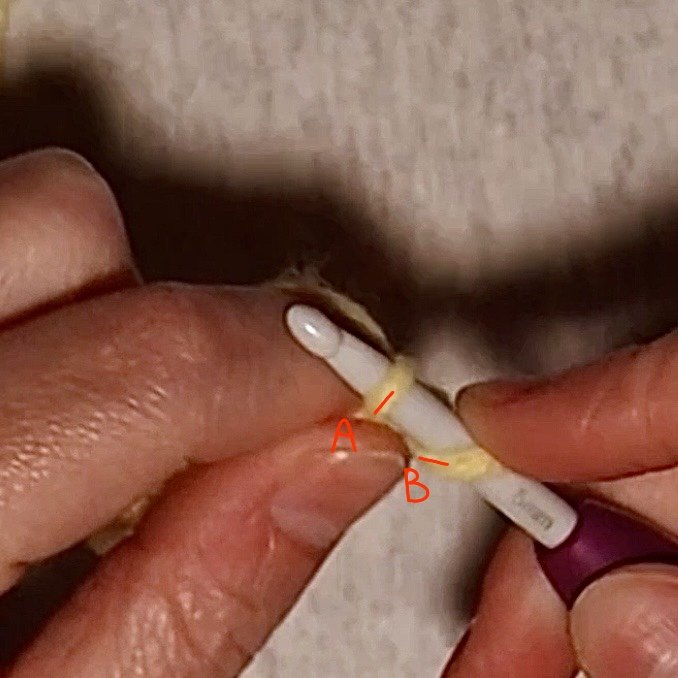
Step 2 - Exiting the Chain - Part B
There are now two loops on my crochet hook.
A - This is the first loop on my hook.
This was previously the working yarn I wrapped around my hook and pulled through the Chain Stitch.
B - This is the second loop on my hook.
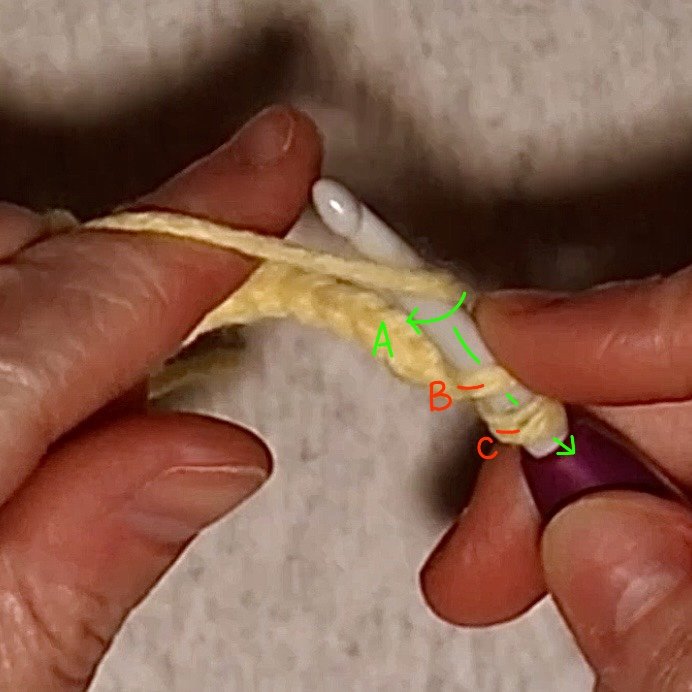
Step 3 - Pulling Through Both Loops
I am now going to wrap my working yarn up and around my hook again. Then, once that yarn is wrapped around my hook, I will pull it through those two loops on my hook.
A (First Green Arrow) - This is the path I will take to wrap my working around my hook.
B - This is the first loop on my hook.
C - This is the second loop on my hook.
Second Green Arrow- This is the path I am taking to pull my working yarn through those two loops.
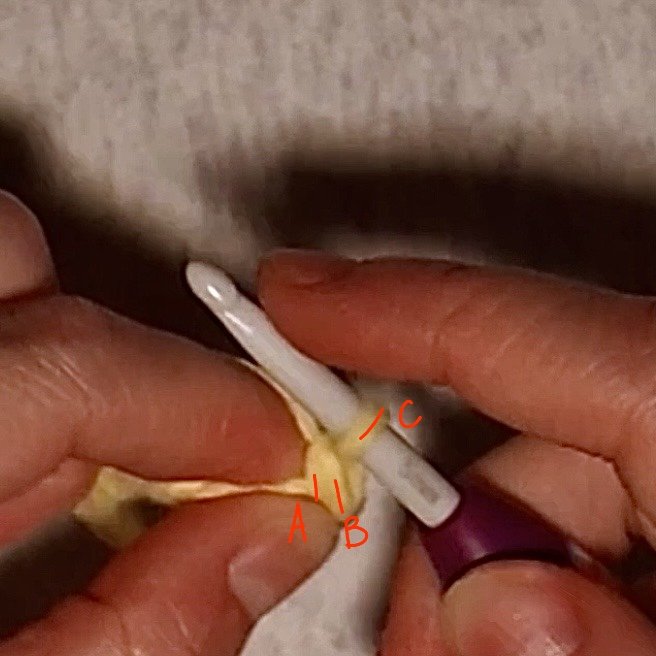
Step 4 - First Single Crochet Complete
With that last loop remaining, I have now completed my first Single Crochet!
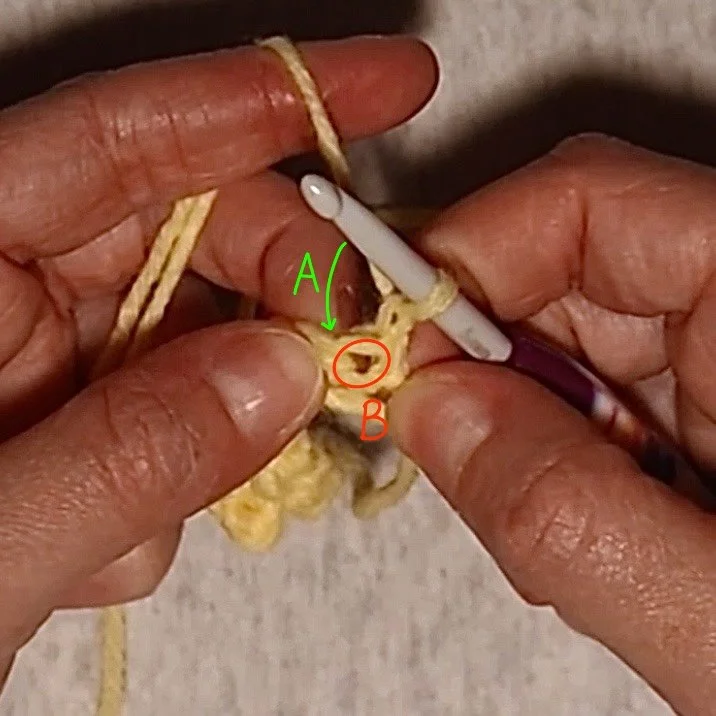
Step 5 - Single Crochet on a Single Crochet
To start the second row, once I have placed a single crochet in the last chain stitch of my foundation, I will chain one and then turn my work so I can crochet back the other way across all of the single crochet’s I just made.
A - This is the path I will take to place my hook into the top of the last Single Crochet of the previous row.
The space I am pointing to is the top of the Single Crochet directly below.
B - This is the space I am going to place my hook into to begin my half double crochet.
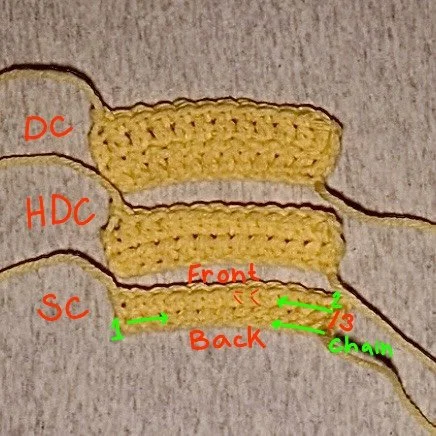
Finished
Here is the final swatch of my two rows of Single Crochets.
DC - I have included my Double Crochet Swatch for reference, to display the size and stitch differences between the four.
You can find the tutorial for the Double Crochet Swatch Here.
HDC -I have included my Half Double Crochet Swatch for reference, to display the size and stitch differences between the four.
You can find the tutorial for the Half Double Crochet Swatch Here.
SC - This is the Swatch I have made for the Single Crochet Tutorial
Front - The top row of the swatch, is what the front of your stitch will look like. Some crocheters refer to this as the “right” side.
The red lines indicate the bundles of loops you go through in steps 5 and 7
Back - The bottom row of the swatch, is what the back of your stitch will look like. Some crocheters refer to this as the “wrong” side.
Chain -This is the very bottom of the swatch, below the two double crochet rows. This is referred to as the foundation chain.
Number 1 -This is the direction I went when crocheting the bottom row.
Number 2 -This is the direction I went when crocheting the top row.
Number 3 - This is the edge of the swatch.
This edge consists of the two chains I made at the of the end of first row before turning my work and starting on my second row, as illustrated in step 4 - part A.