Straight Seam
Option 1 - Working in the First Stitch
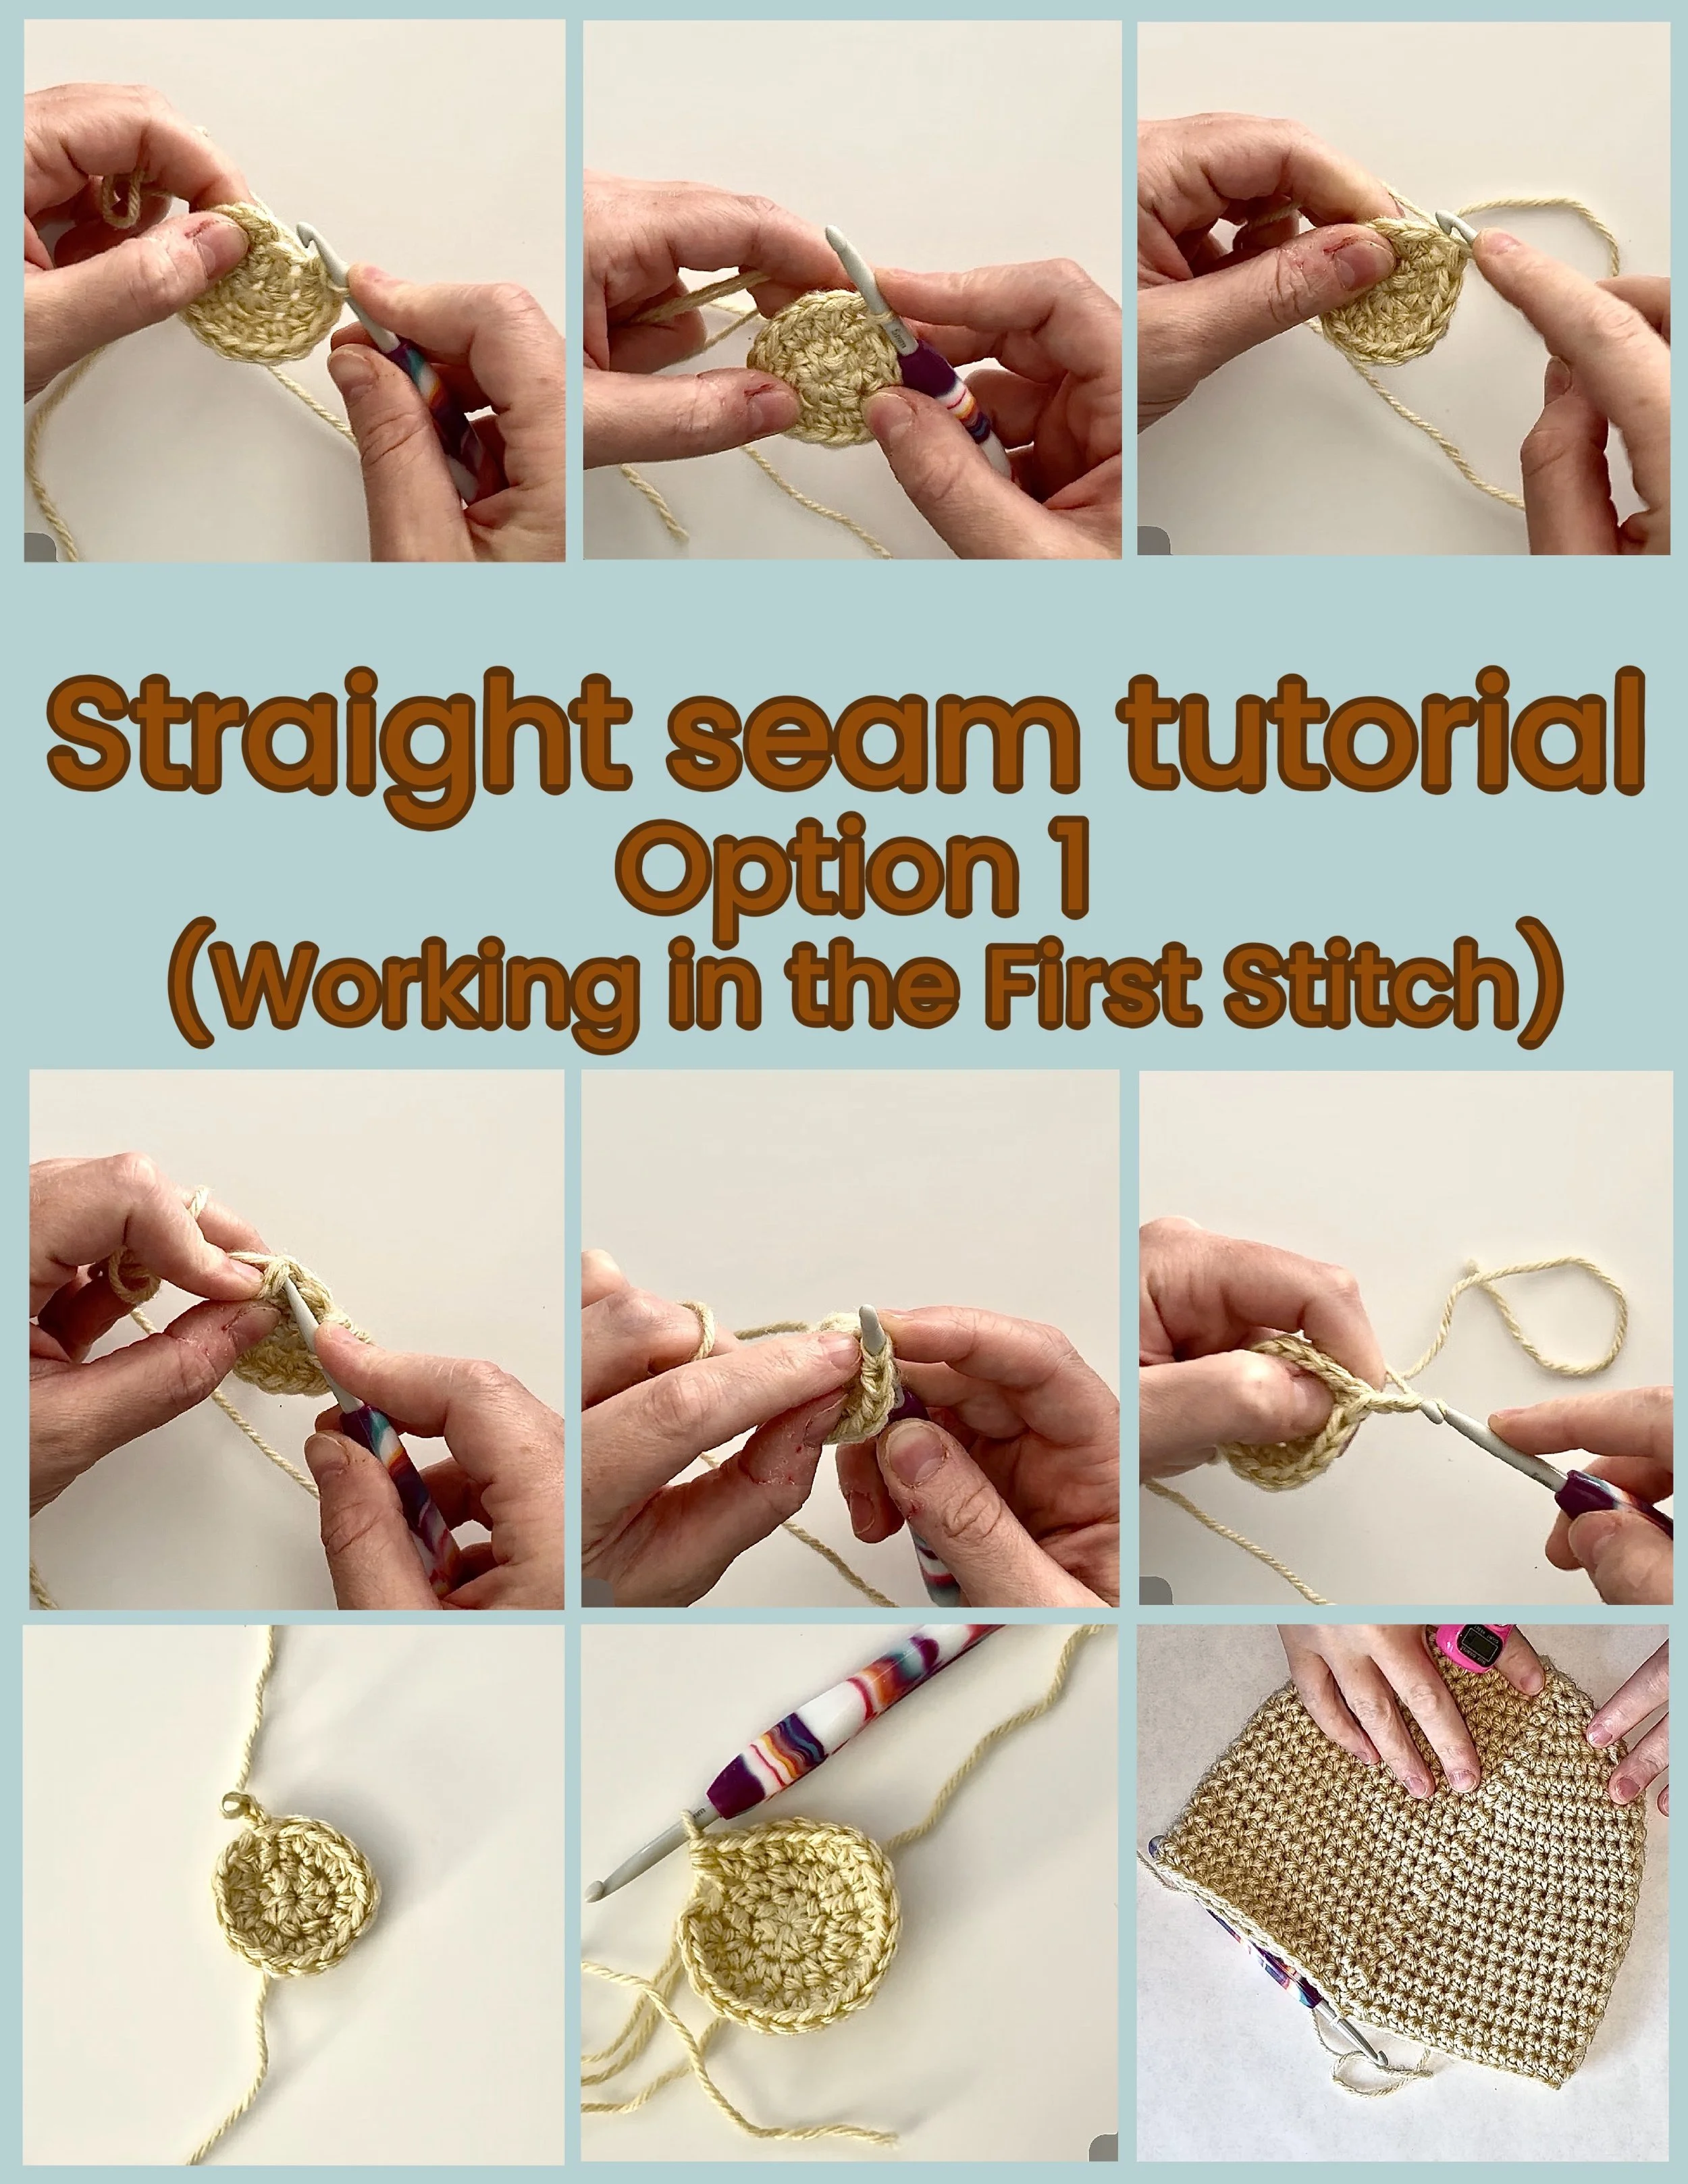
You have a few options at your disposal if you want to maintain a straight seam while you are working in the round. I do have a second tutorial for a different method here. In this method, you are going to be alternating when you crochet in the first Stitch of each round.
When you are working in Even rounds, you will start your round by crocheting in the first Stitch of the previous round; Then, you will end the round by crocheting in the last Stitch of the previous round.
When you are working in Odd rounds, you will start your round by skipping the first stitch and crocheting in the second stitch of the previous round; Then, you end the round by crocheting in the first stitch of the previous round (this is after the same stitch you initially skipped at the beginning).
I have provided some labeled photos to hopefully help you visualize the steps you will take when using this method.
Watch the Video Tutorial Here!
Scroll Below for the Written Instructions
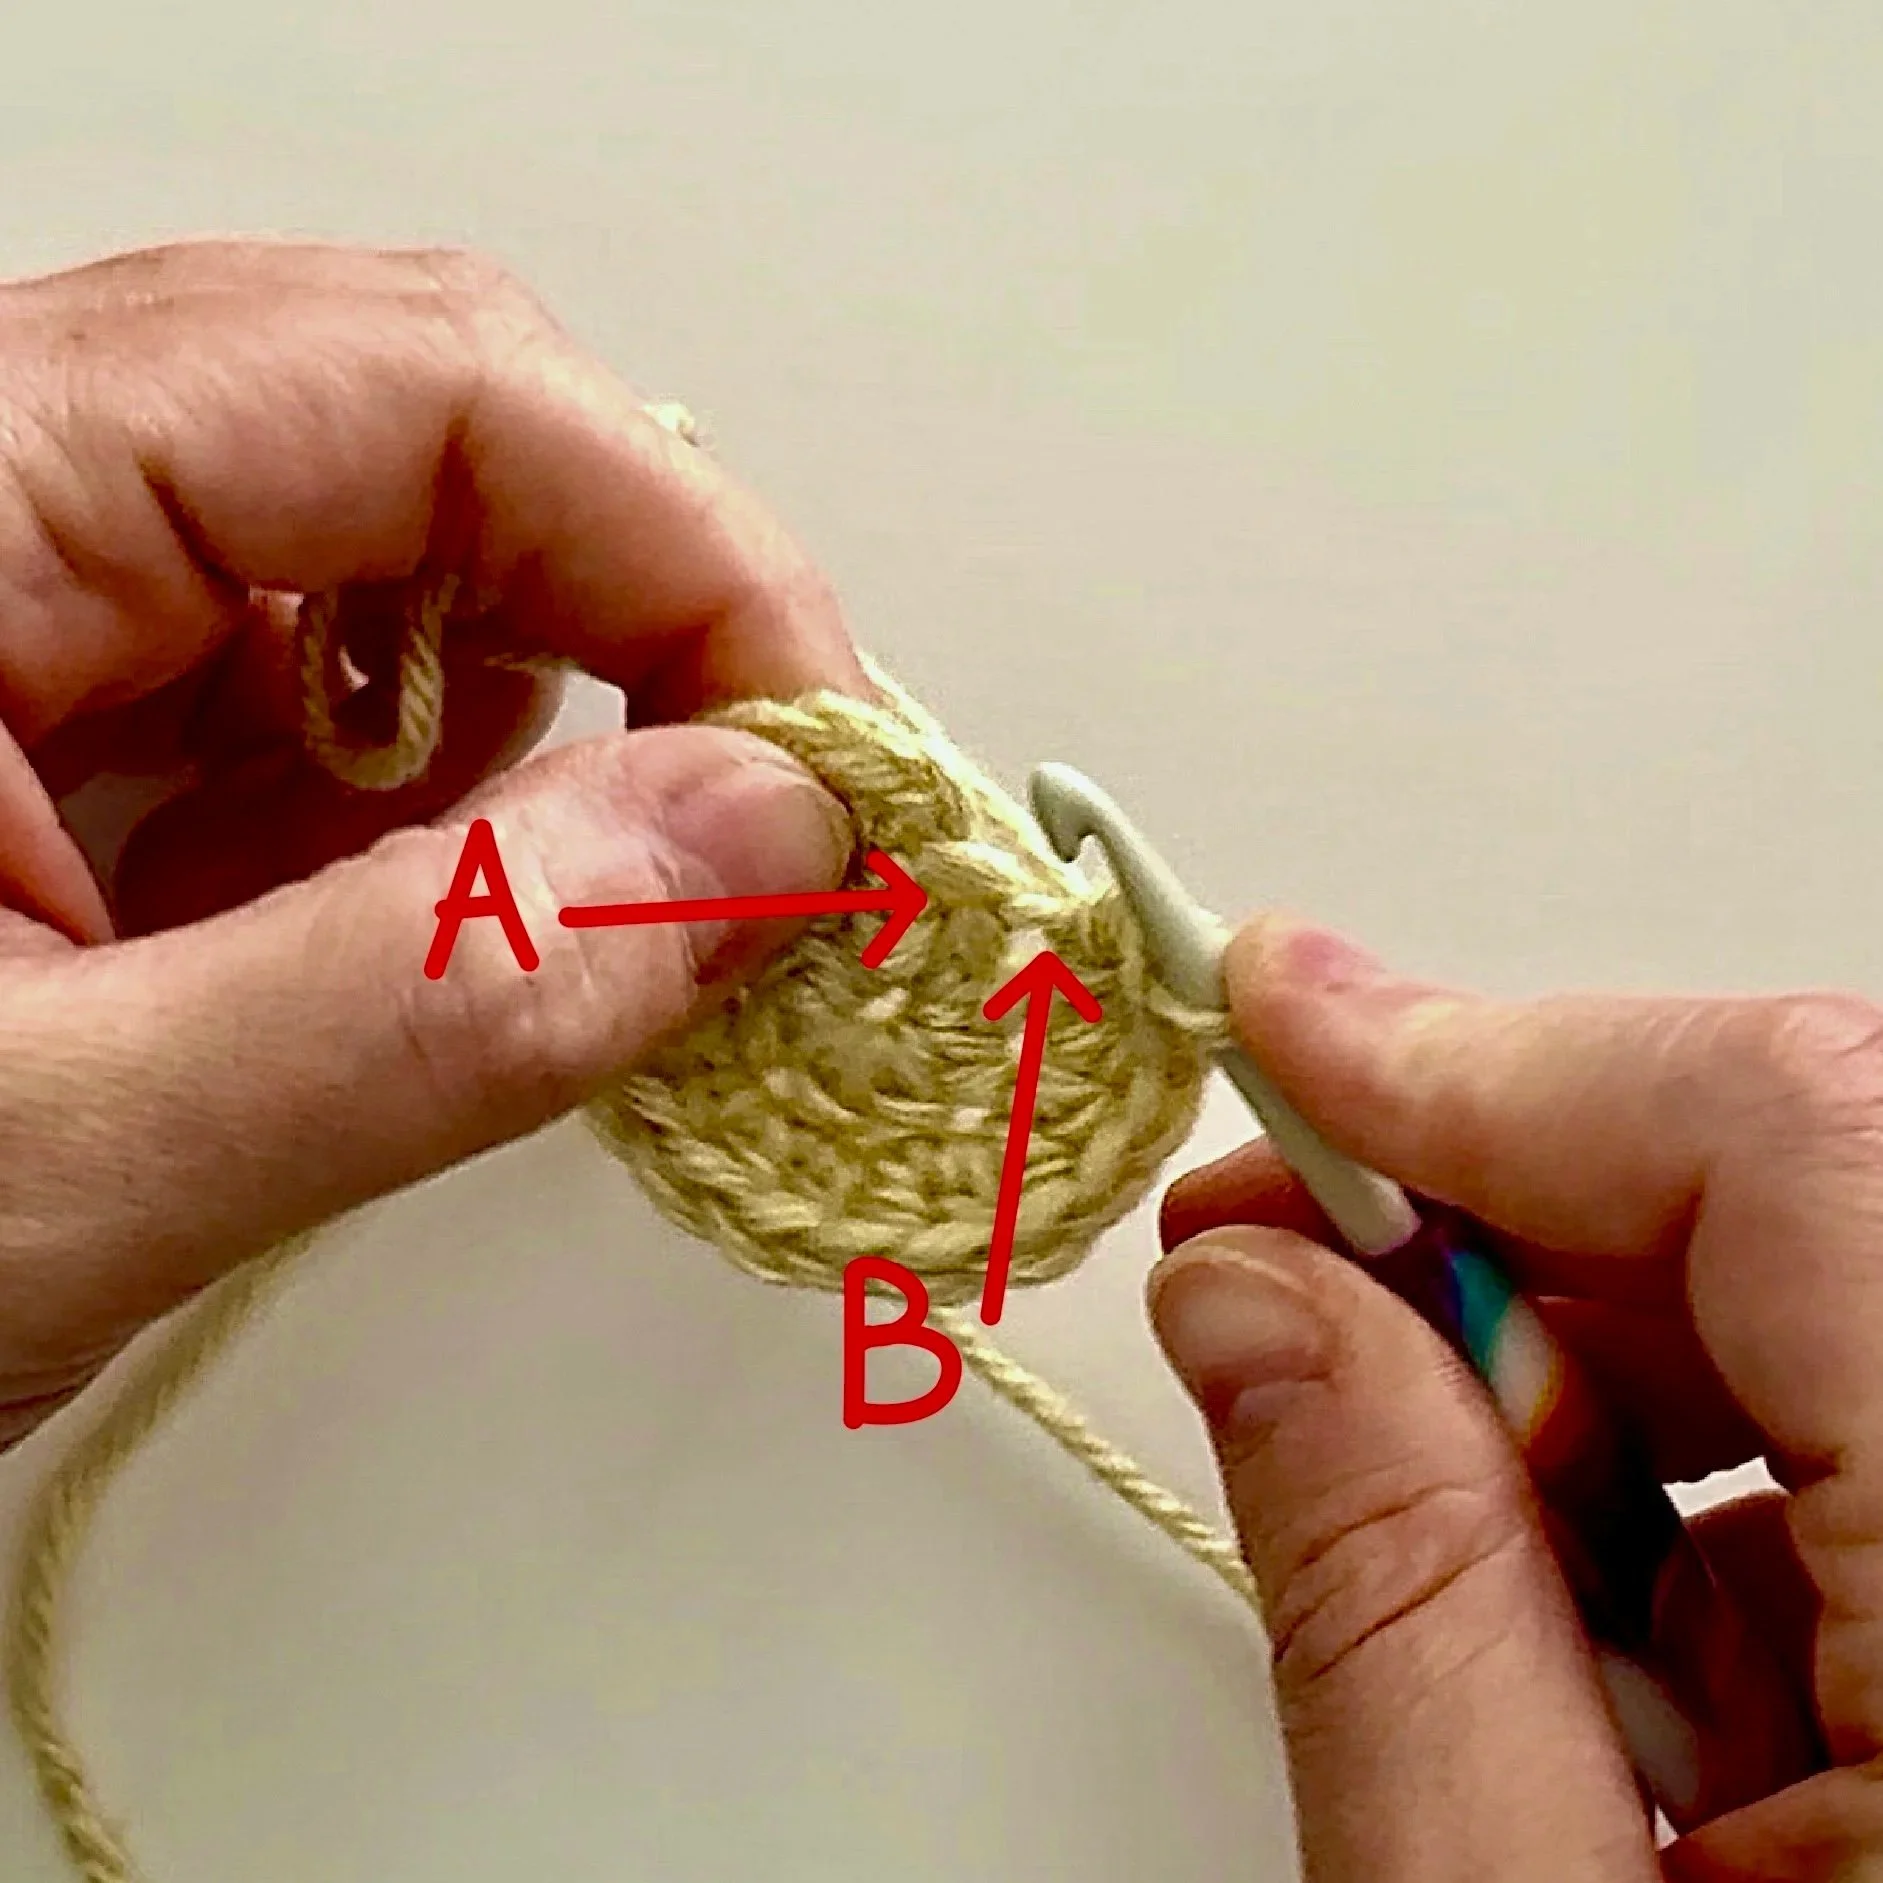
Step 1 - Where to Finish VS. Where Not to Finish on even rounds
After increasing around an initial magic circle, I am coming to the end of my second round and have placed the final Half Double Crochet of round two.
I have already placed all of my Half Double Crochet’s in the current round I am working on, and am preparing to close the round.
This is an example of what the even rounds will look like before I bring the first and last St’s together to close the round.
Notice the gap between the first and last St’s of the round, this is normal, and will not be noticeable once I get farther into my work.
By placing a Slip Stitch in the first Half Double Crochet of the round, I am essentially pulling my last Half Double Crochet over to sit right next to that starting Chain of the round.
A - This is the Slip Stitch that was used to close the previous round.
In other words, this is the Slip Stitch that brought the beginning end of the previous round together.
I will NEVER crochet here when using this particular method.
B - This is where I have placed my last Half Double Crochet.
When I am working an even round, I am going to Skip over this and then Slip Stitch into the first Half Double Crochet of my current round.
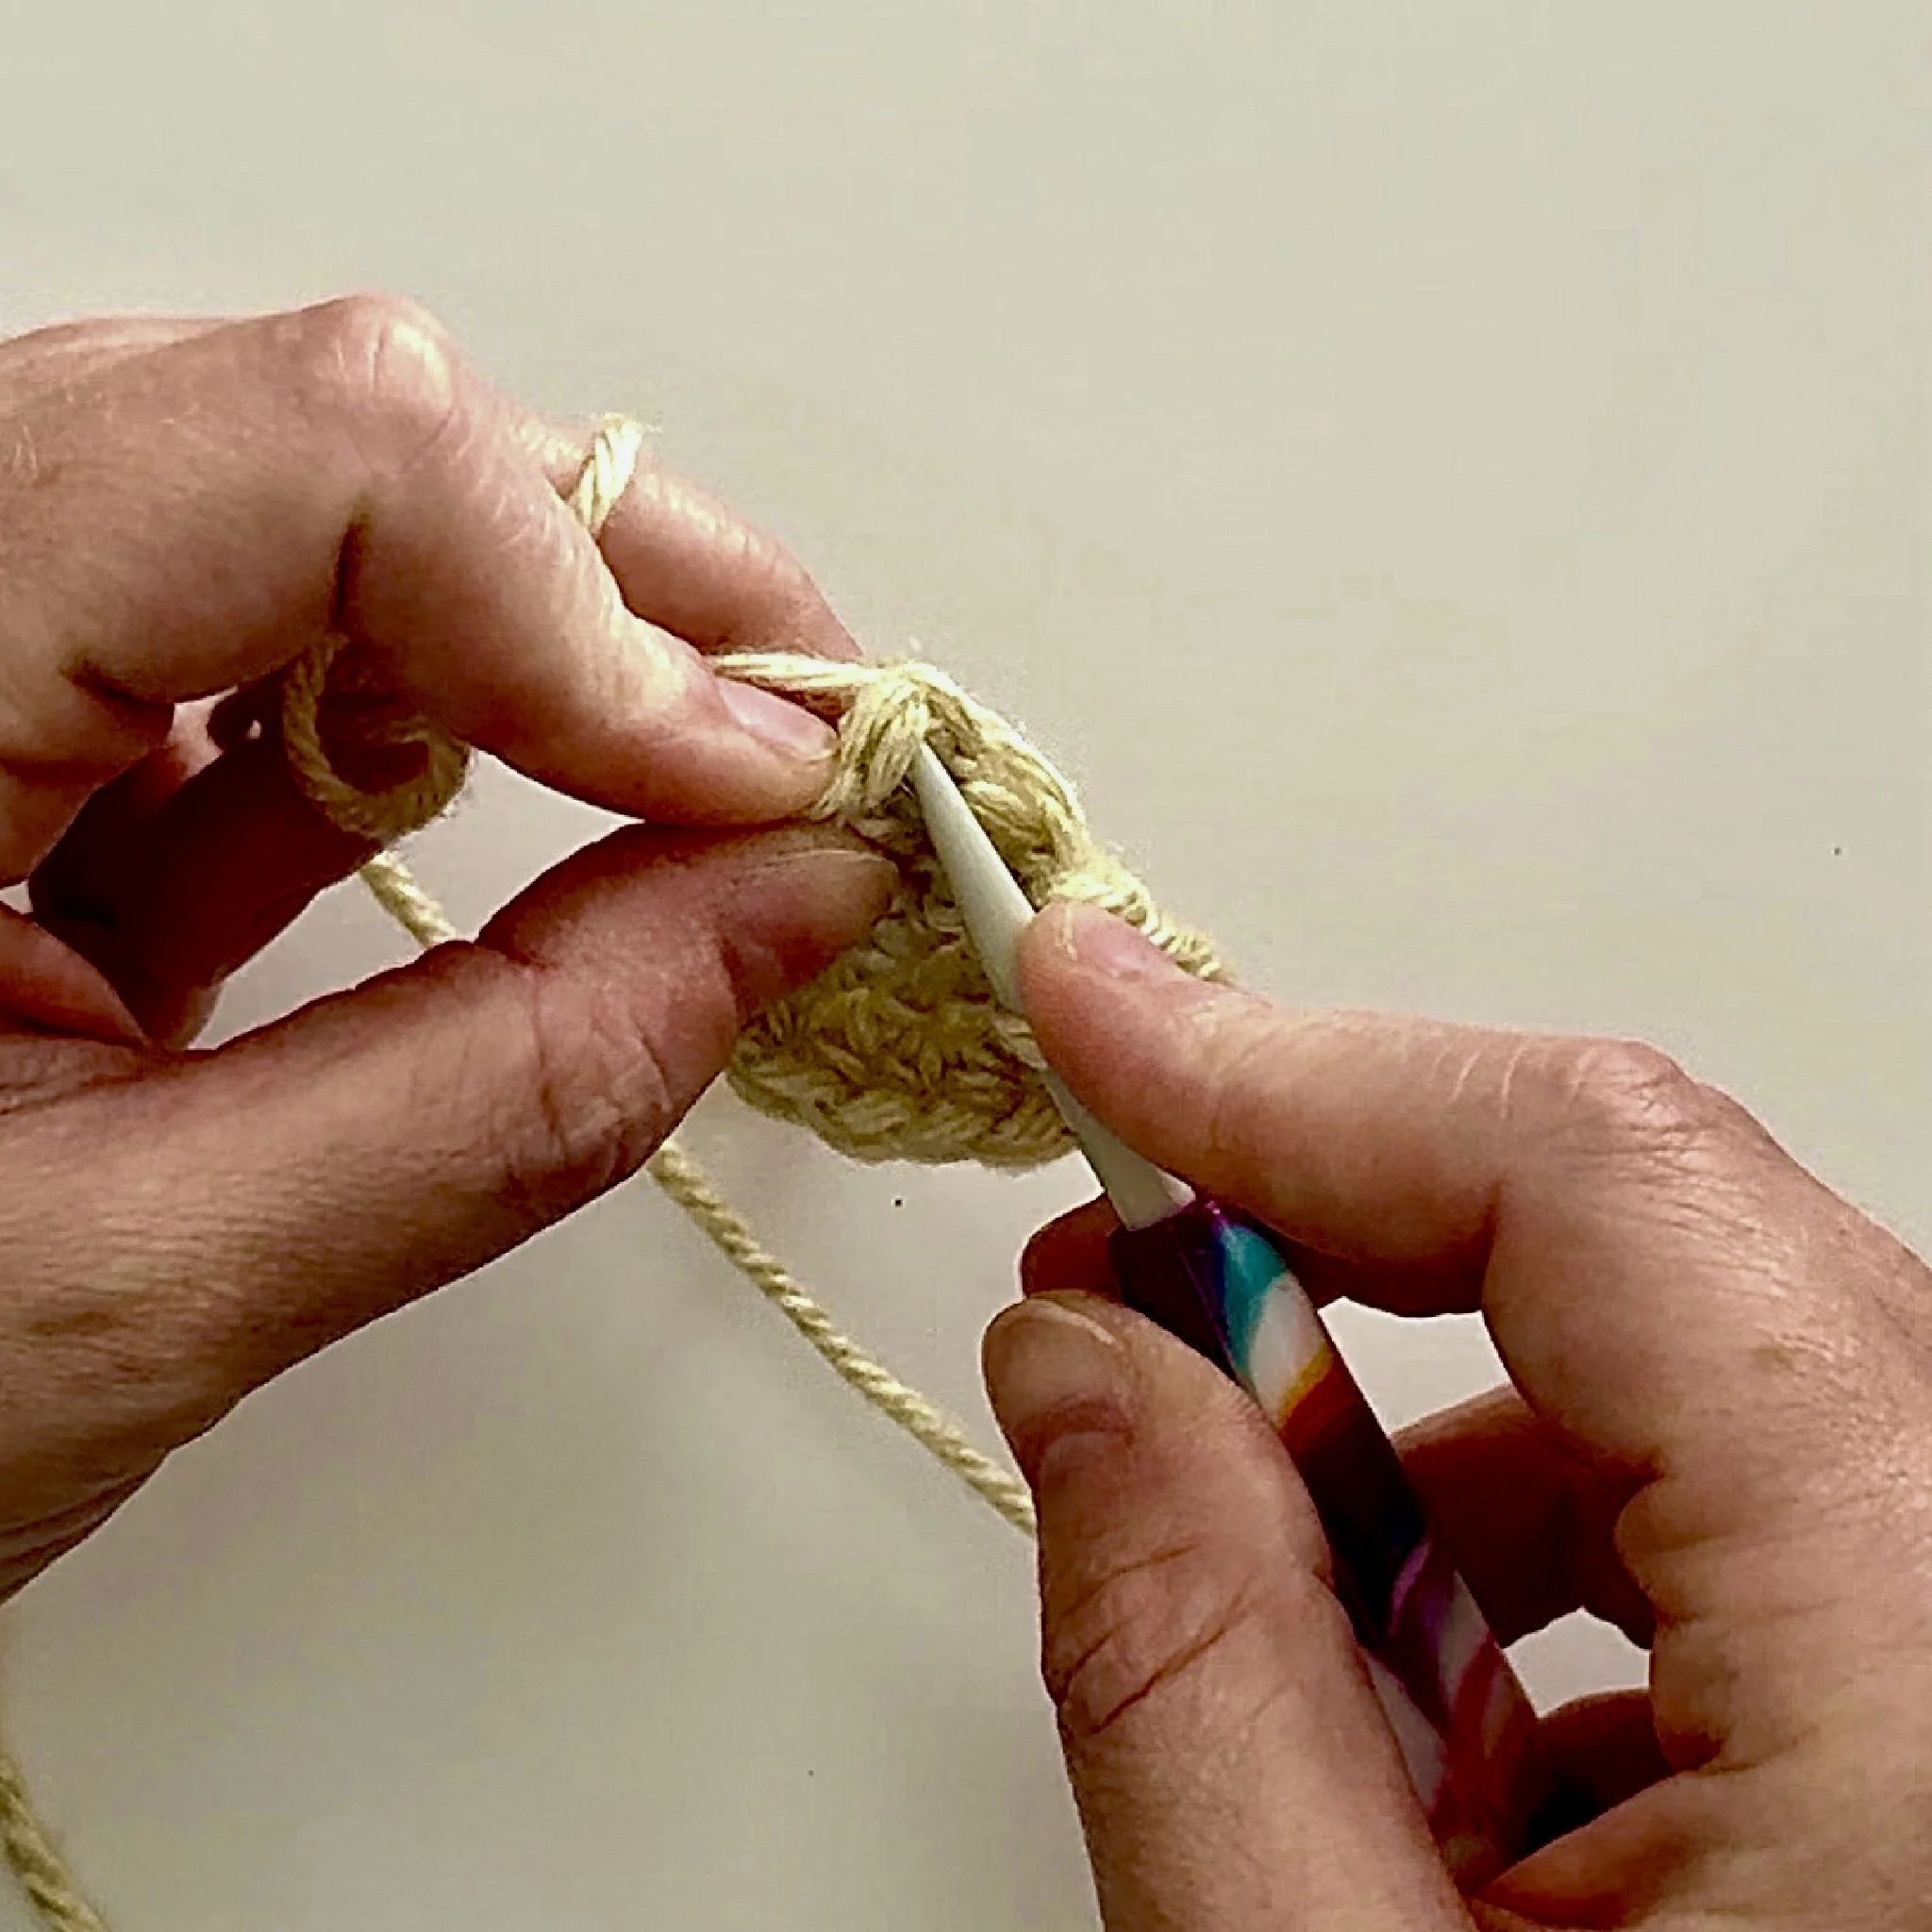
Step 2 - Closing the Round - Part A
After I place my last stitch of the round, (as pictured above) I will place my hook into the first stitch of the round to begin a Slip Stitch.
This is a birds eye view of what it looks like when I am placing this Slip Stitch.
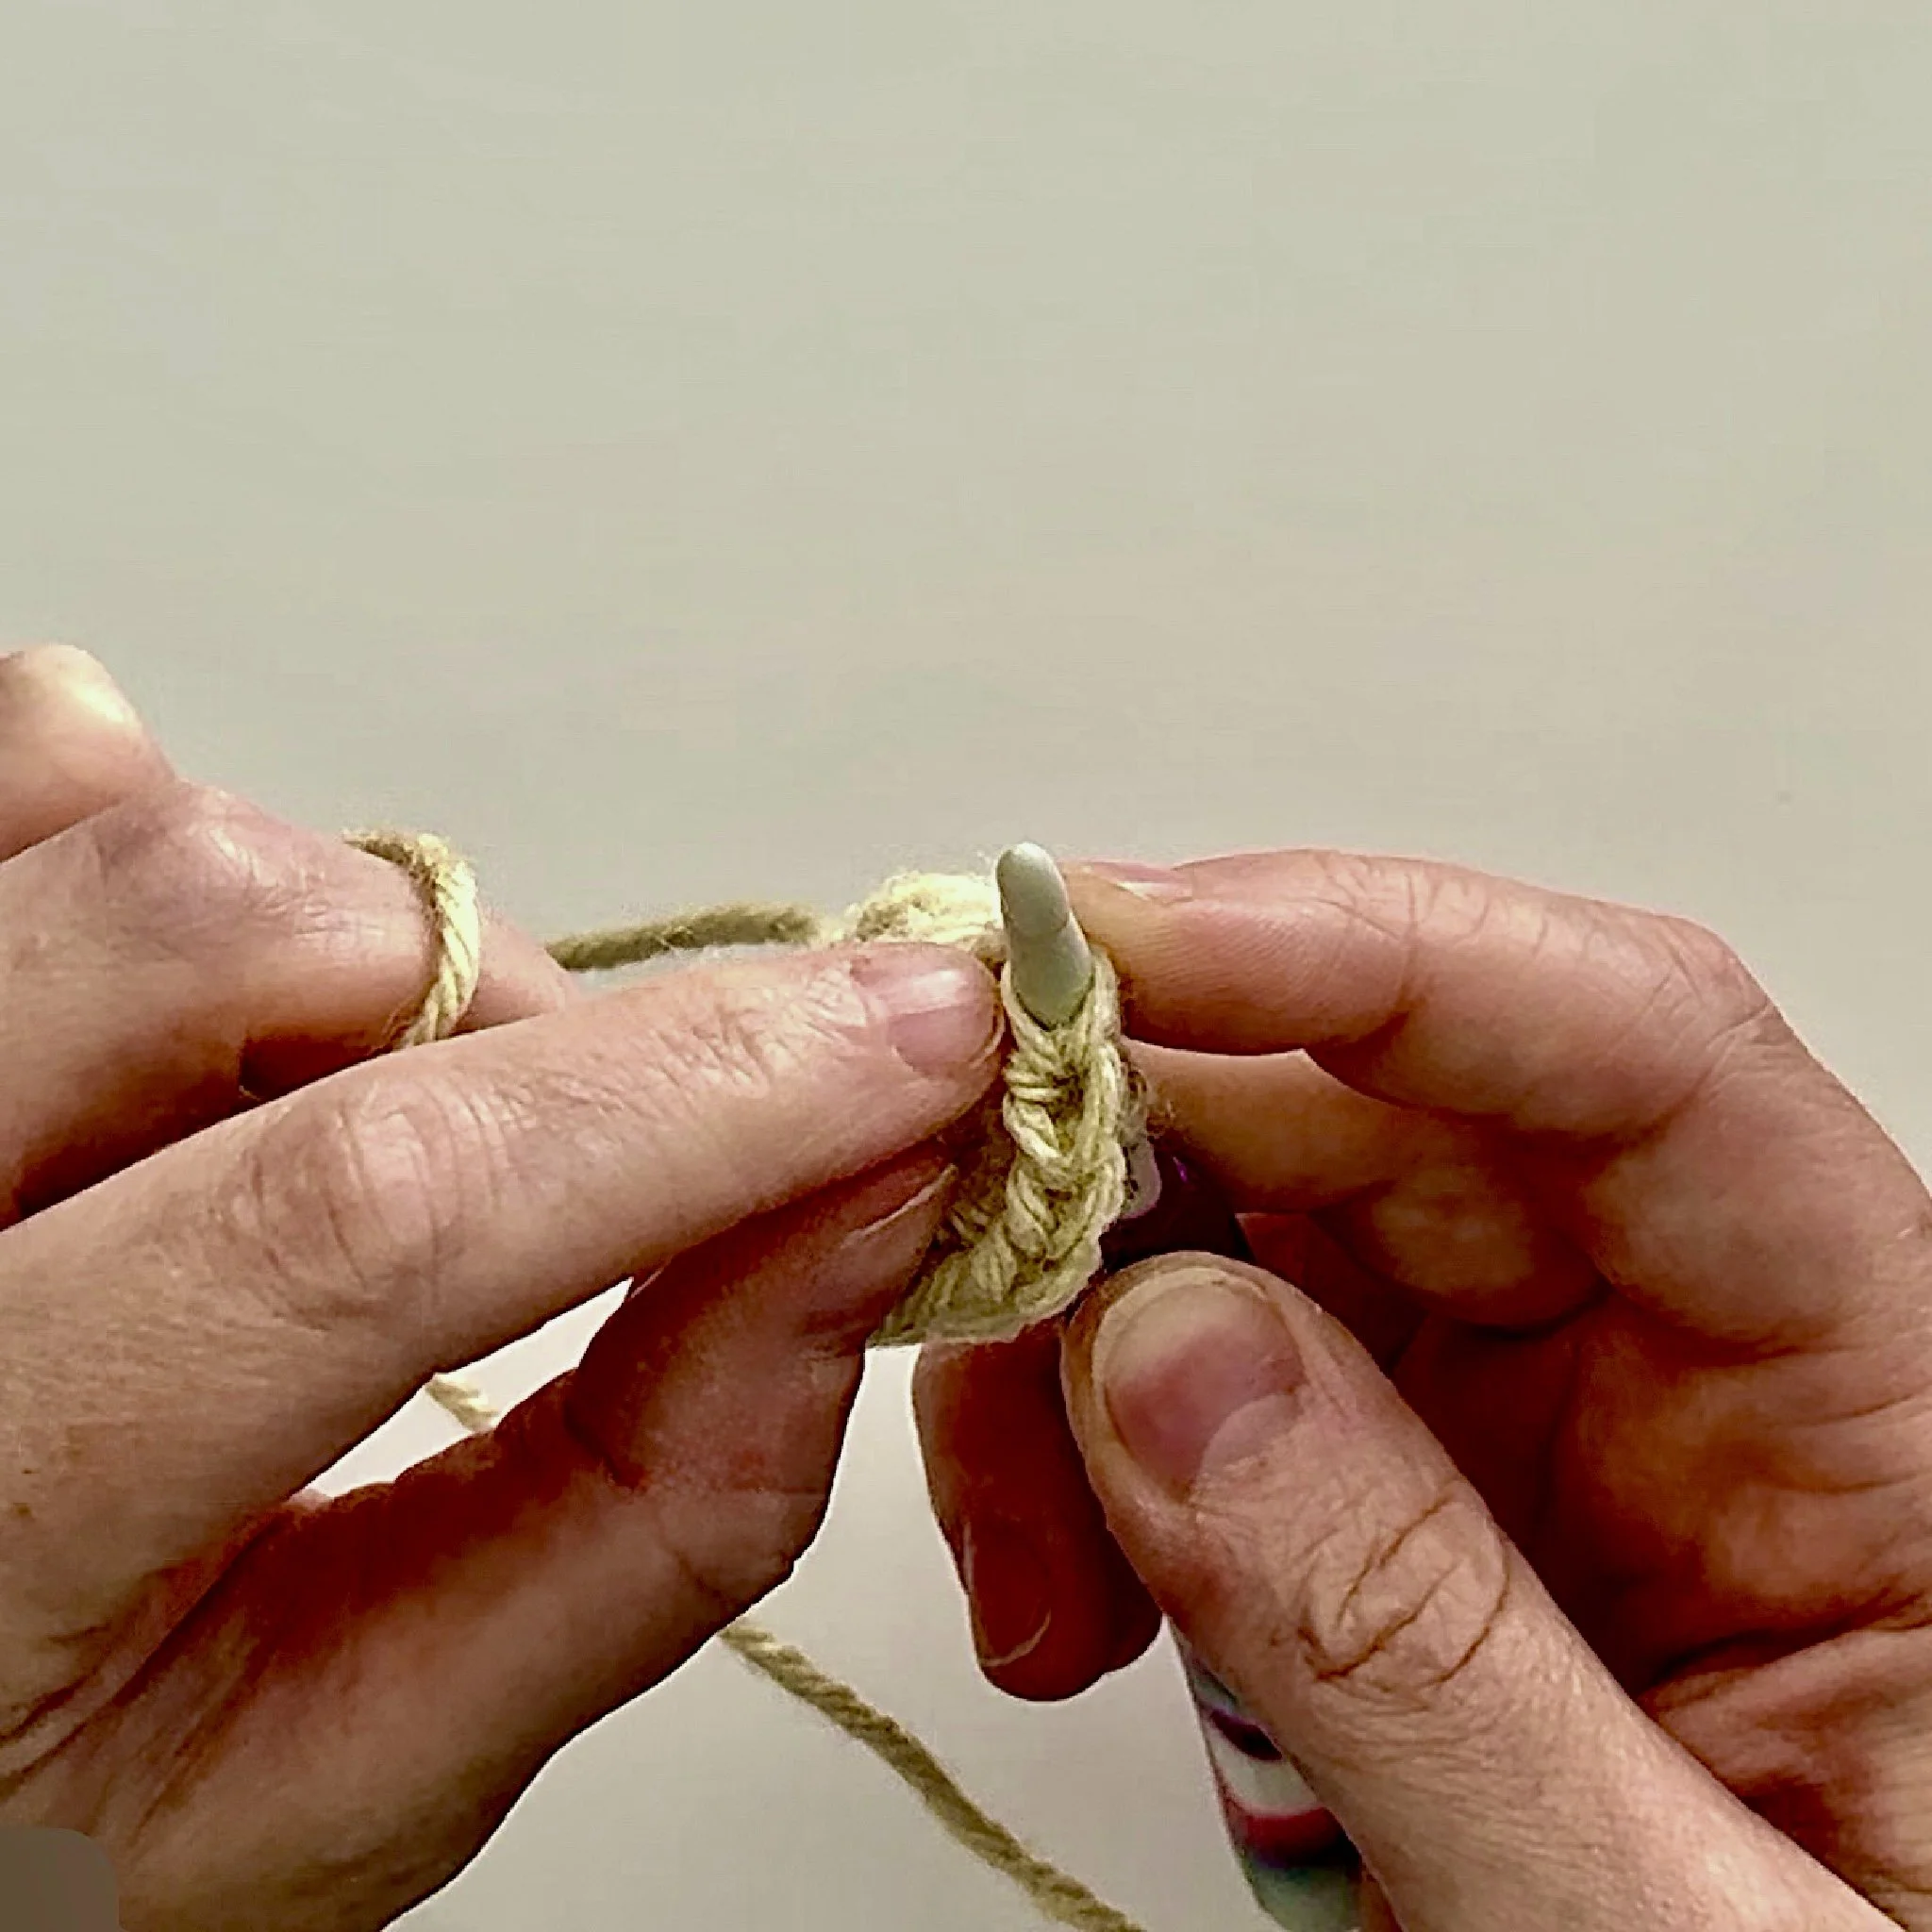
Step 2 - Closing the Round - Part B
Alternately, this is what I see when I look at my piece from the back while I am creating that slip stitch.
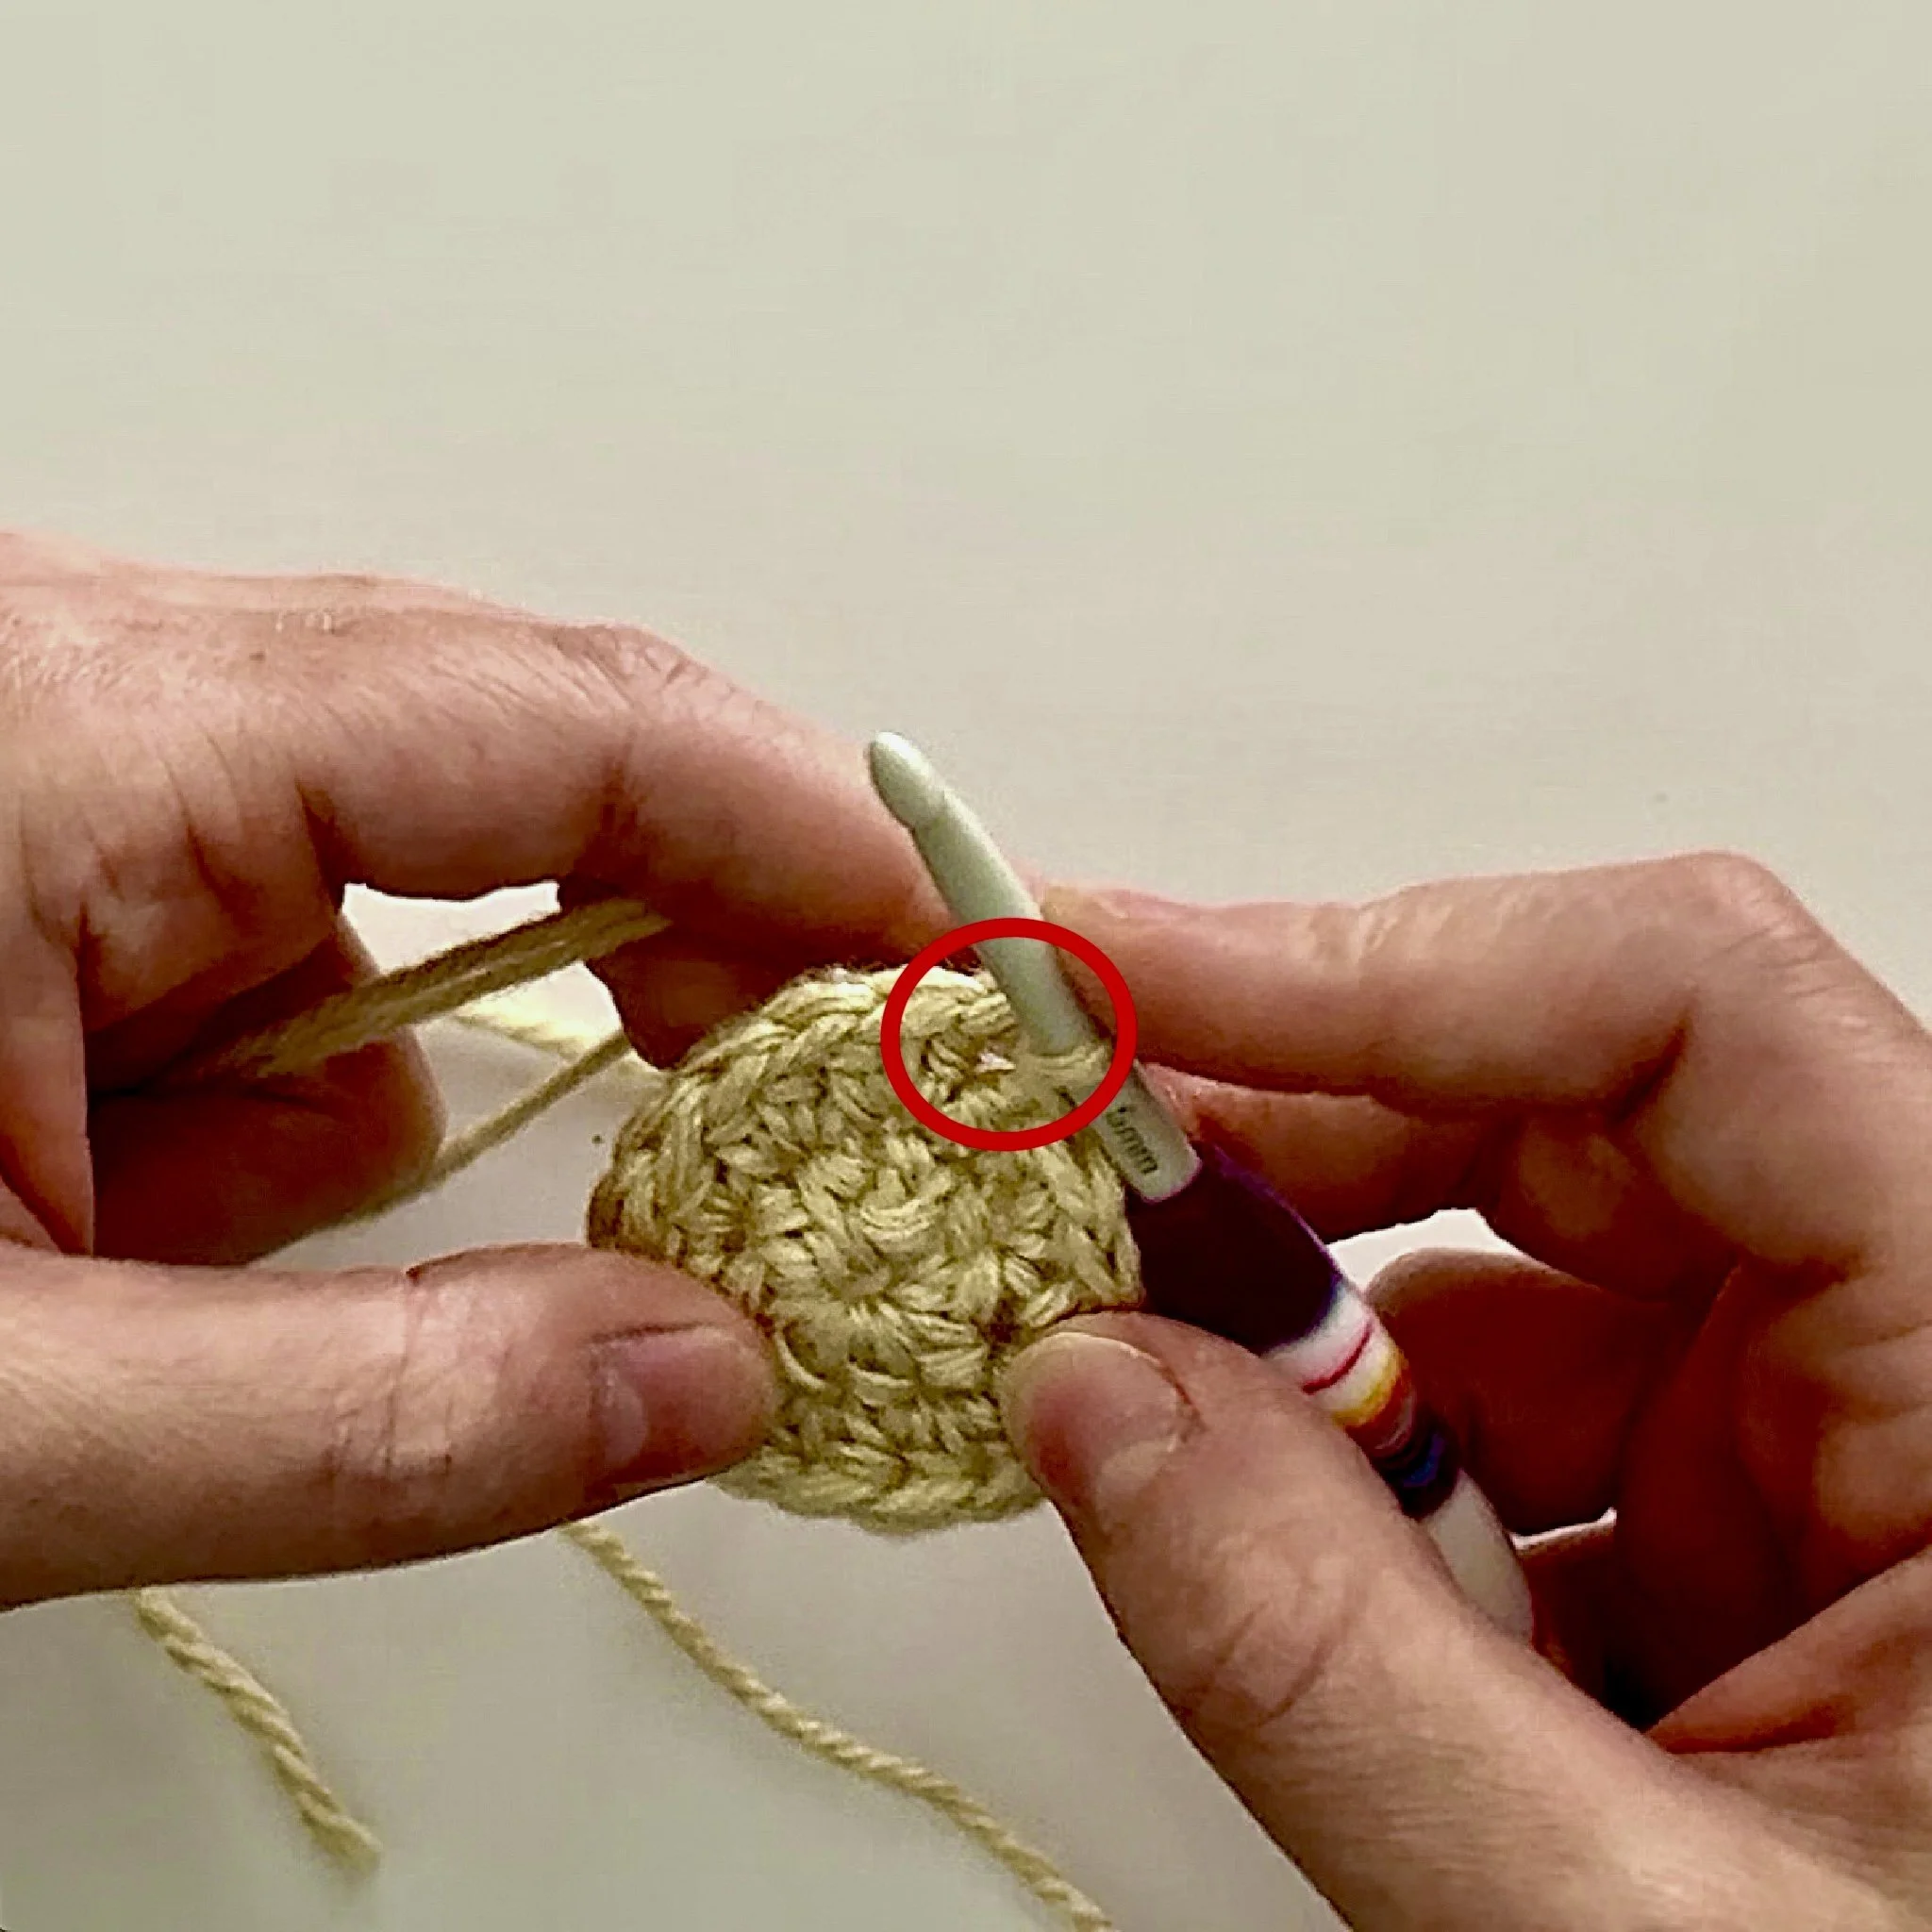
Step 3 - Bringing the Ends Together
By placing a Slip Stitch in the first Stitch of the round, I have pulled the last Half Double Crochet of the round right next to the chain I created to start the round.
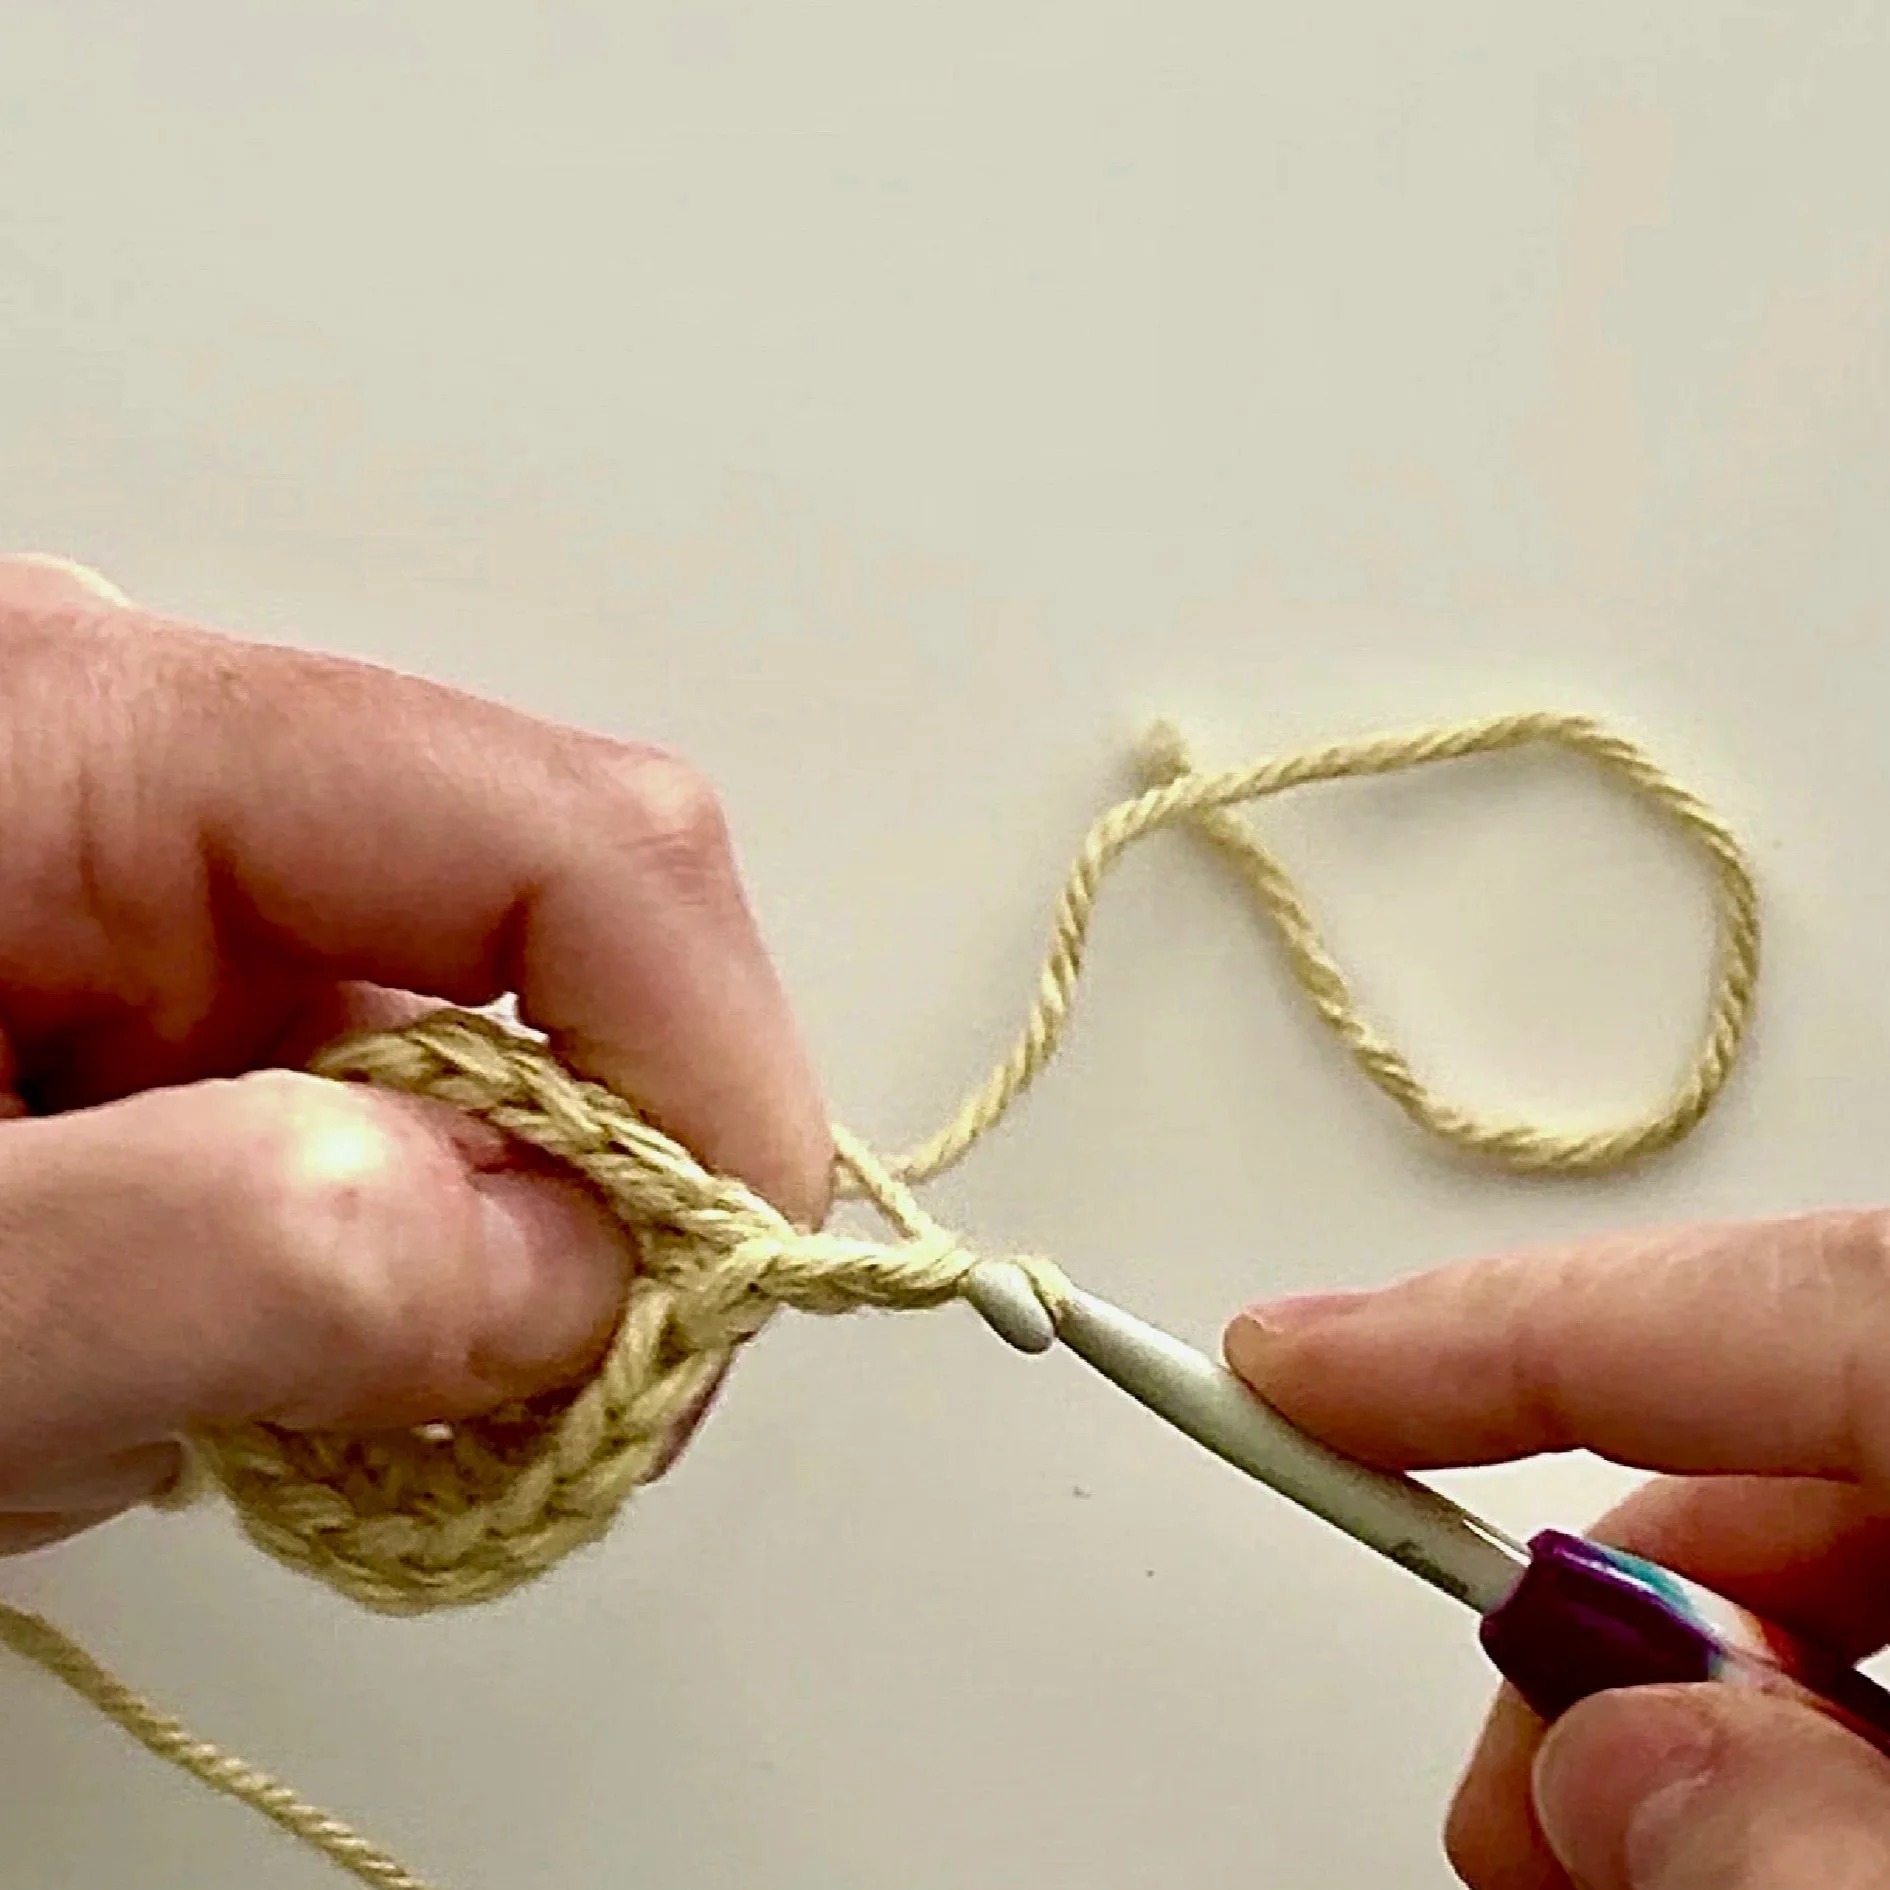
Step 4 - Chaining to S
tart
Now that I have finished my second round, I am going to begin my third round by chaining two.
If I am using Half Double Crochet’s or Double Crochet’s I will Chain 2
If I am using Single Crochet’s or Slip Stitch’s I will Chain 1
If I am using Triple Crochet I will Chain 3
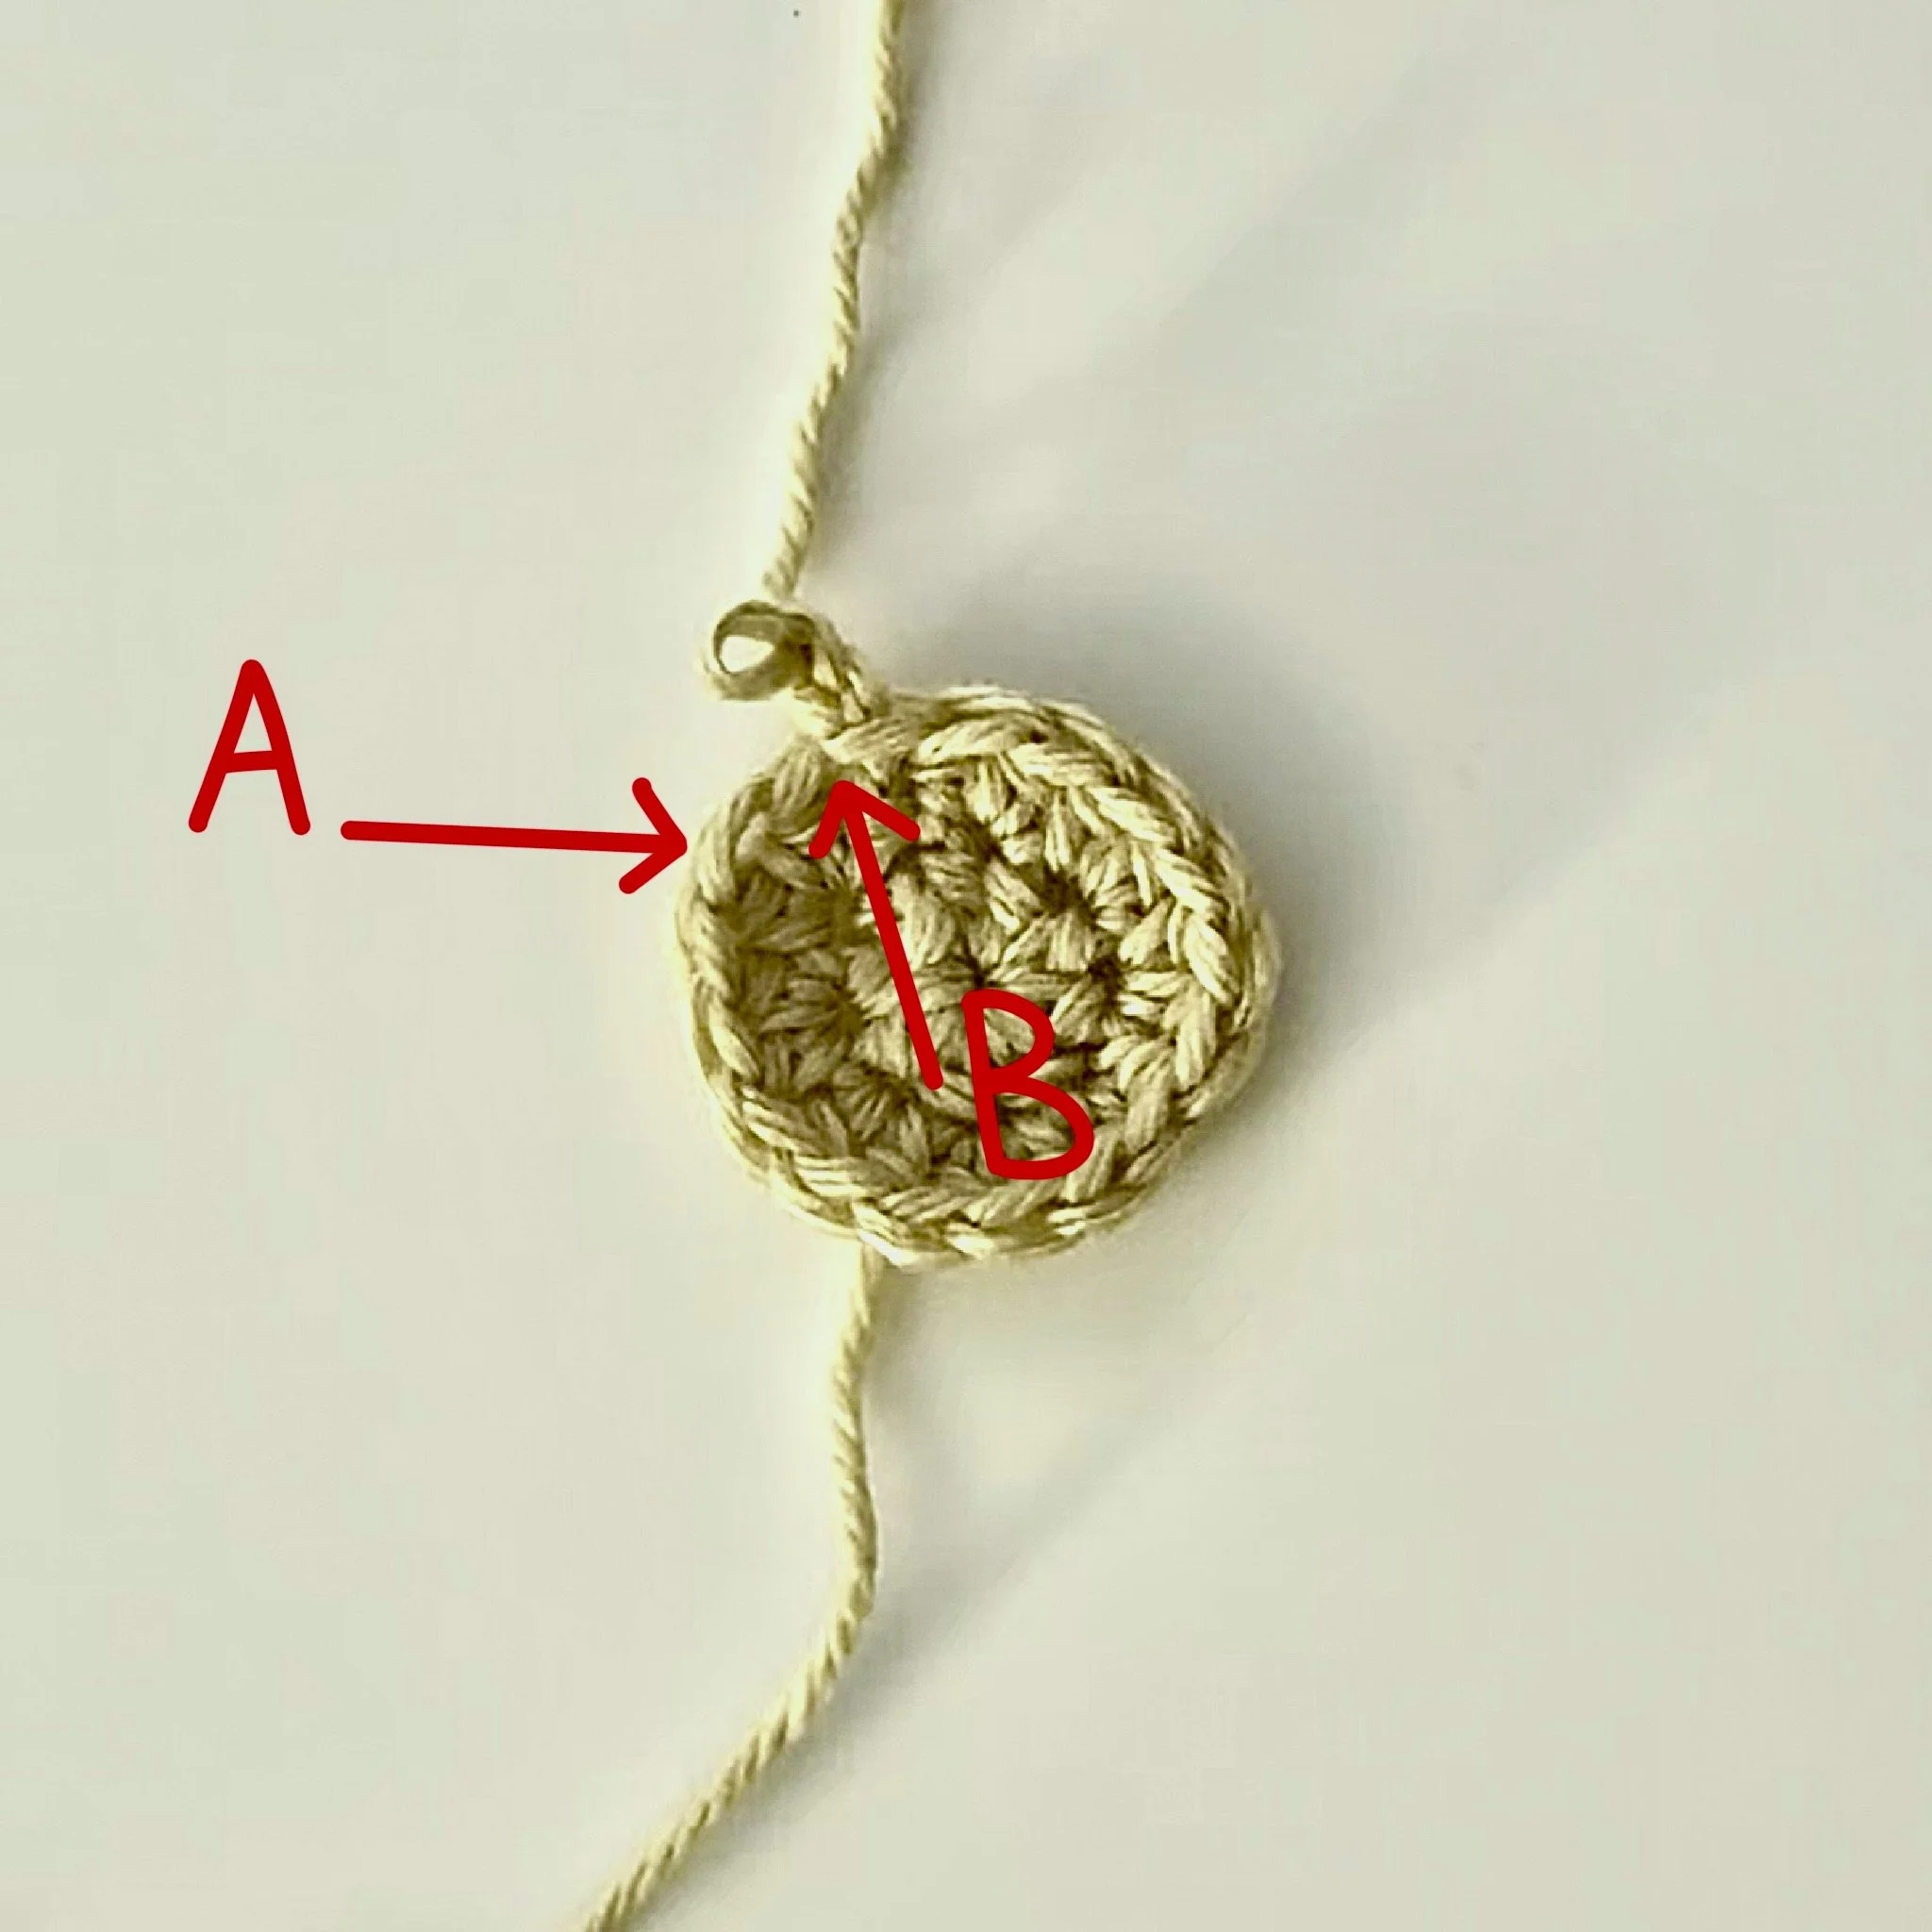
Step 5 - Where to Start VS. Where Not to Start on Odd Rounds
This is what my piece looks like after closing my second round, and creating the chain for the third round.
A - This is the second Stitch of the previous round.
This is where I will place my first Half Double Crochet of odd rounds.
B - This is the first Stitch of the previous round.
This is the Stitch I will Skip at the beginning of odd rounds.
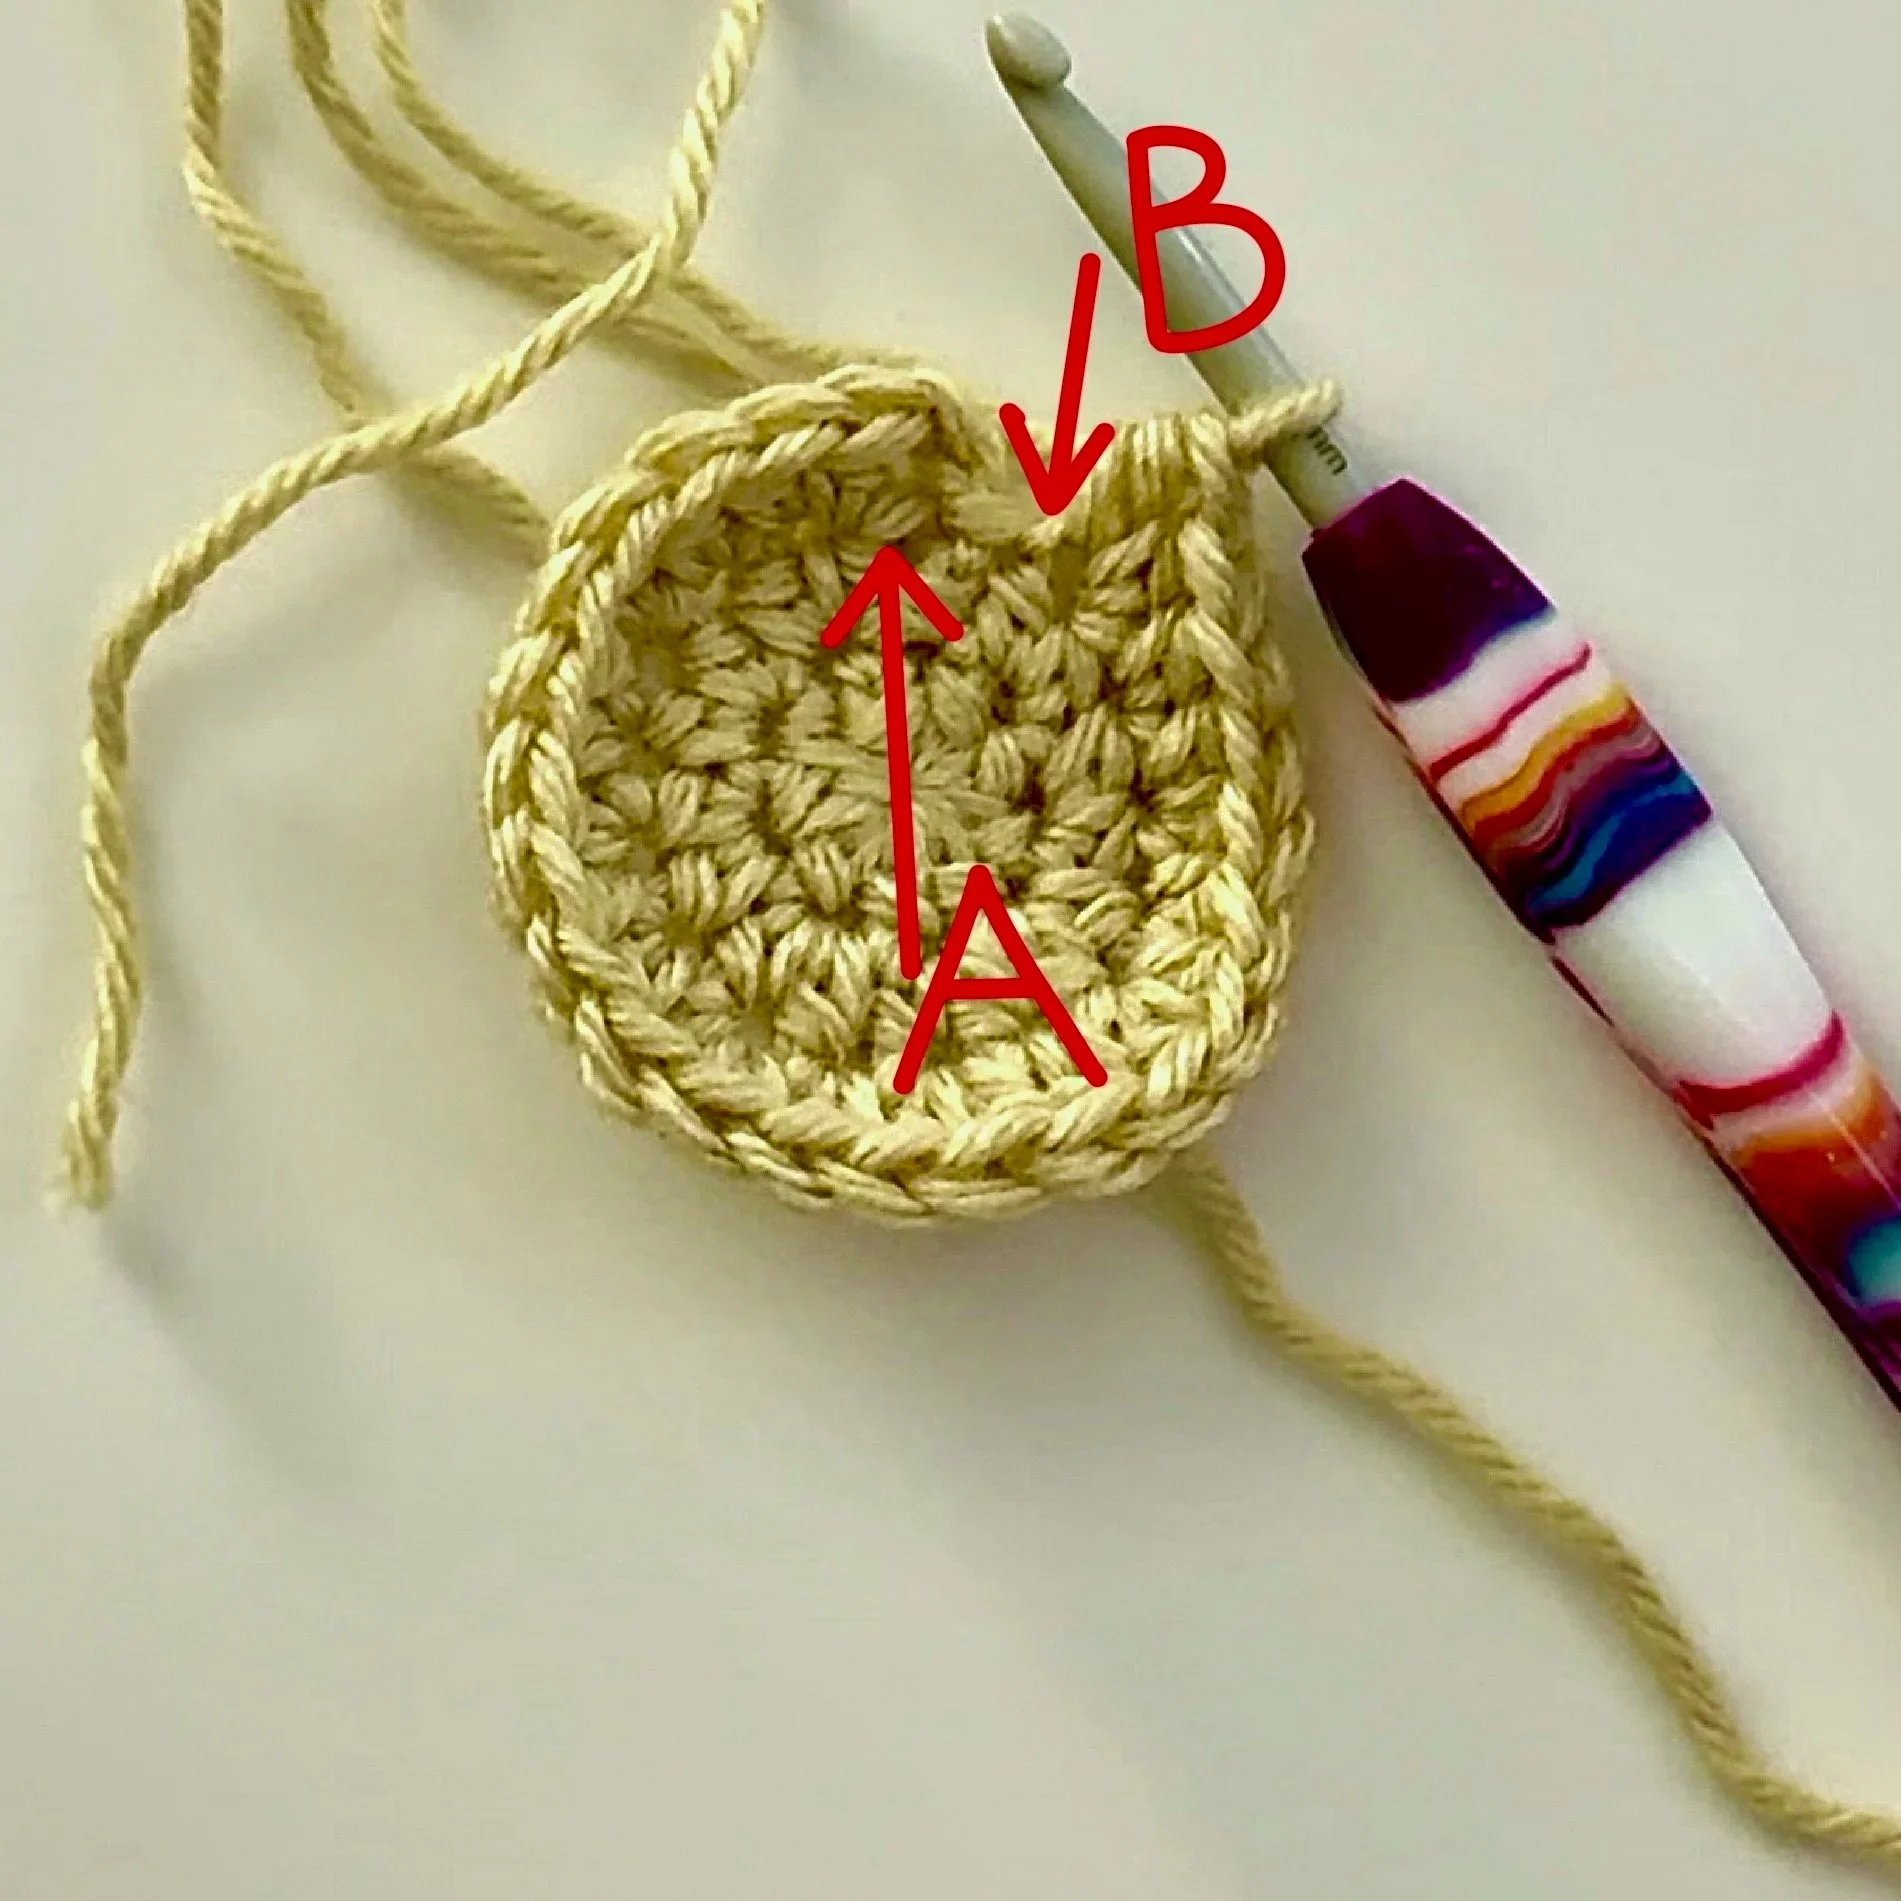
Step 6 - Where to Finish VS. Where Not to Finish on Odd Rounds
After creating that Chain to begin the round, I crochet all the way around according to whatever pattern I am following. This is what my piece looks like once I get to the end of the third round.
This is what the odd rounds will look like before I place the final Stitch of the round.
A - This is the first Stitch of the previous round.
This is the same Stitch that I skipped at the beginning of the current round.
B - This is the Slip Stitch that was used to close the previous round.
This is also the Slip Stitch that brought the beginning and end of the previous round together.
I will NEVER crochet here when using this particular method.
I am going to Skip Slip Stitch B and place one last Half Double Crochet into Stitch A
Contrary to the even round, by placing a Slip Stitch in the first Half Double Crochet of the round, I am instead pulling my Starting Chain over to sit right next to that last Half Double Crochet.
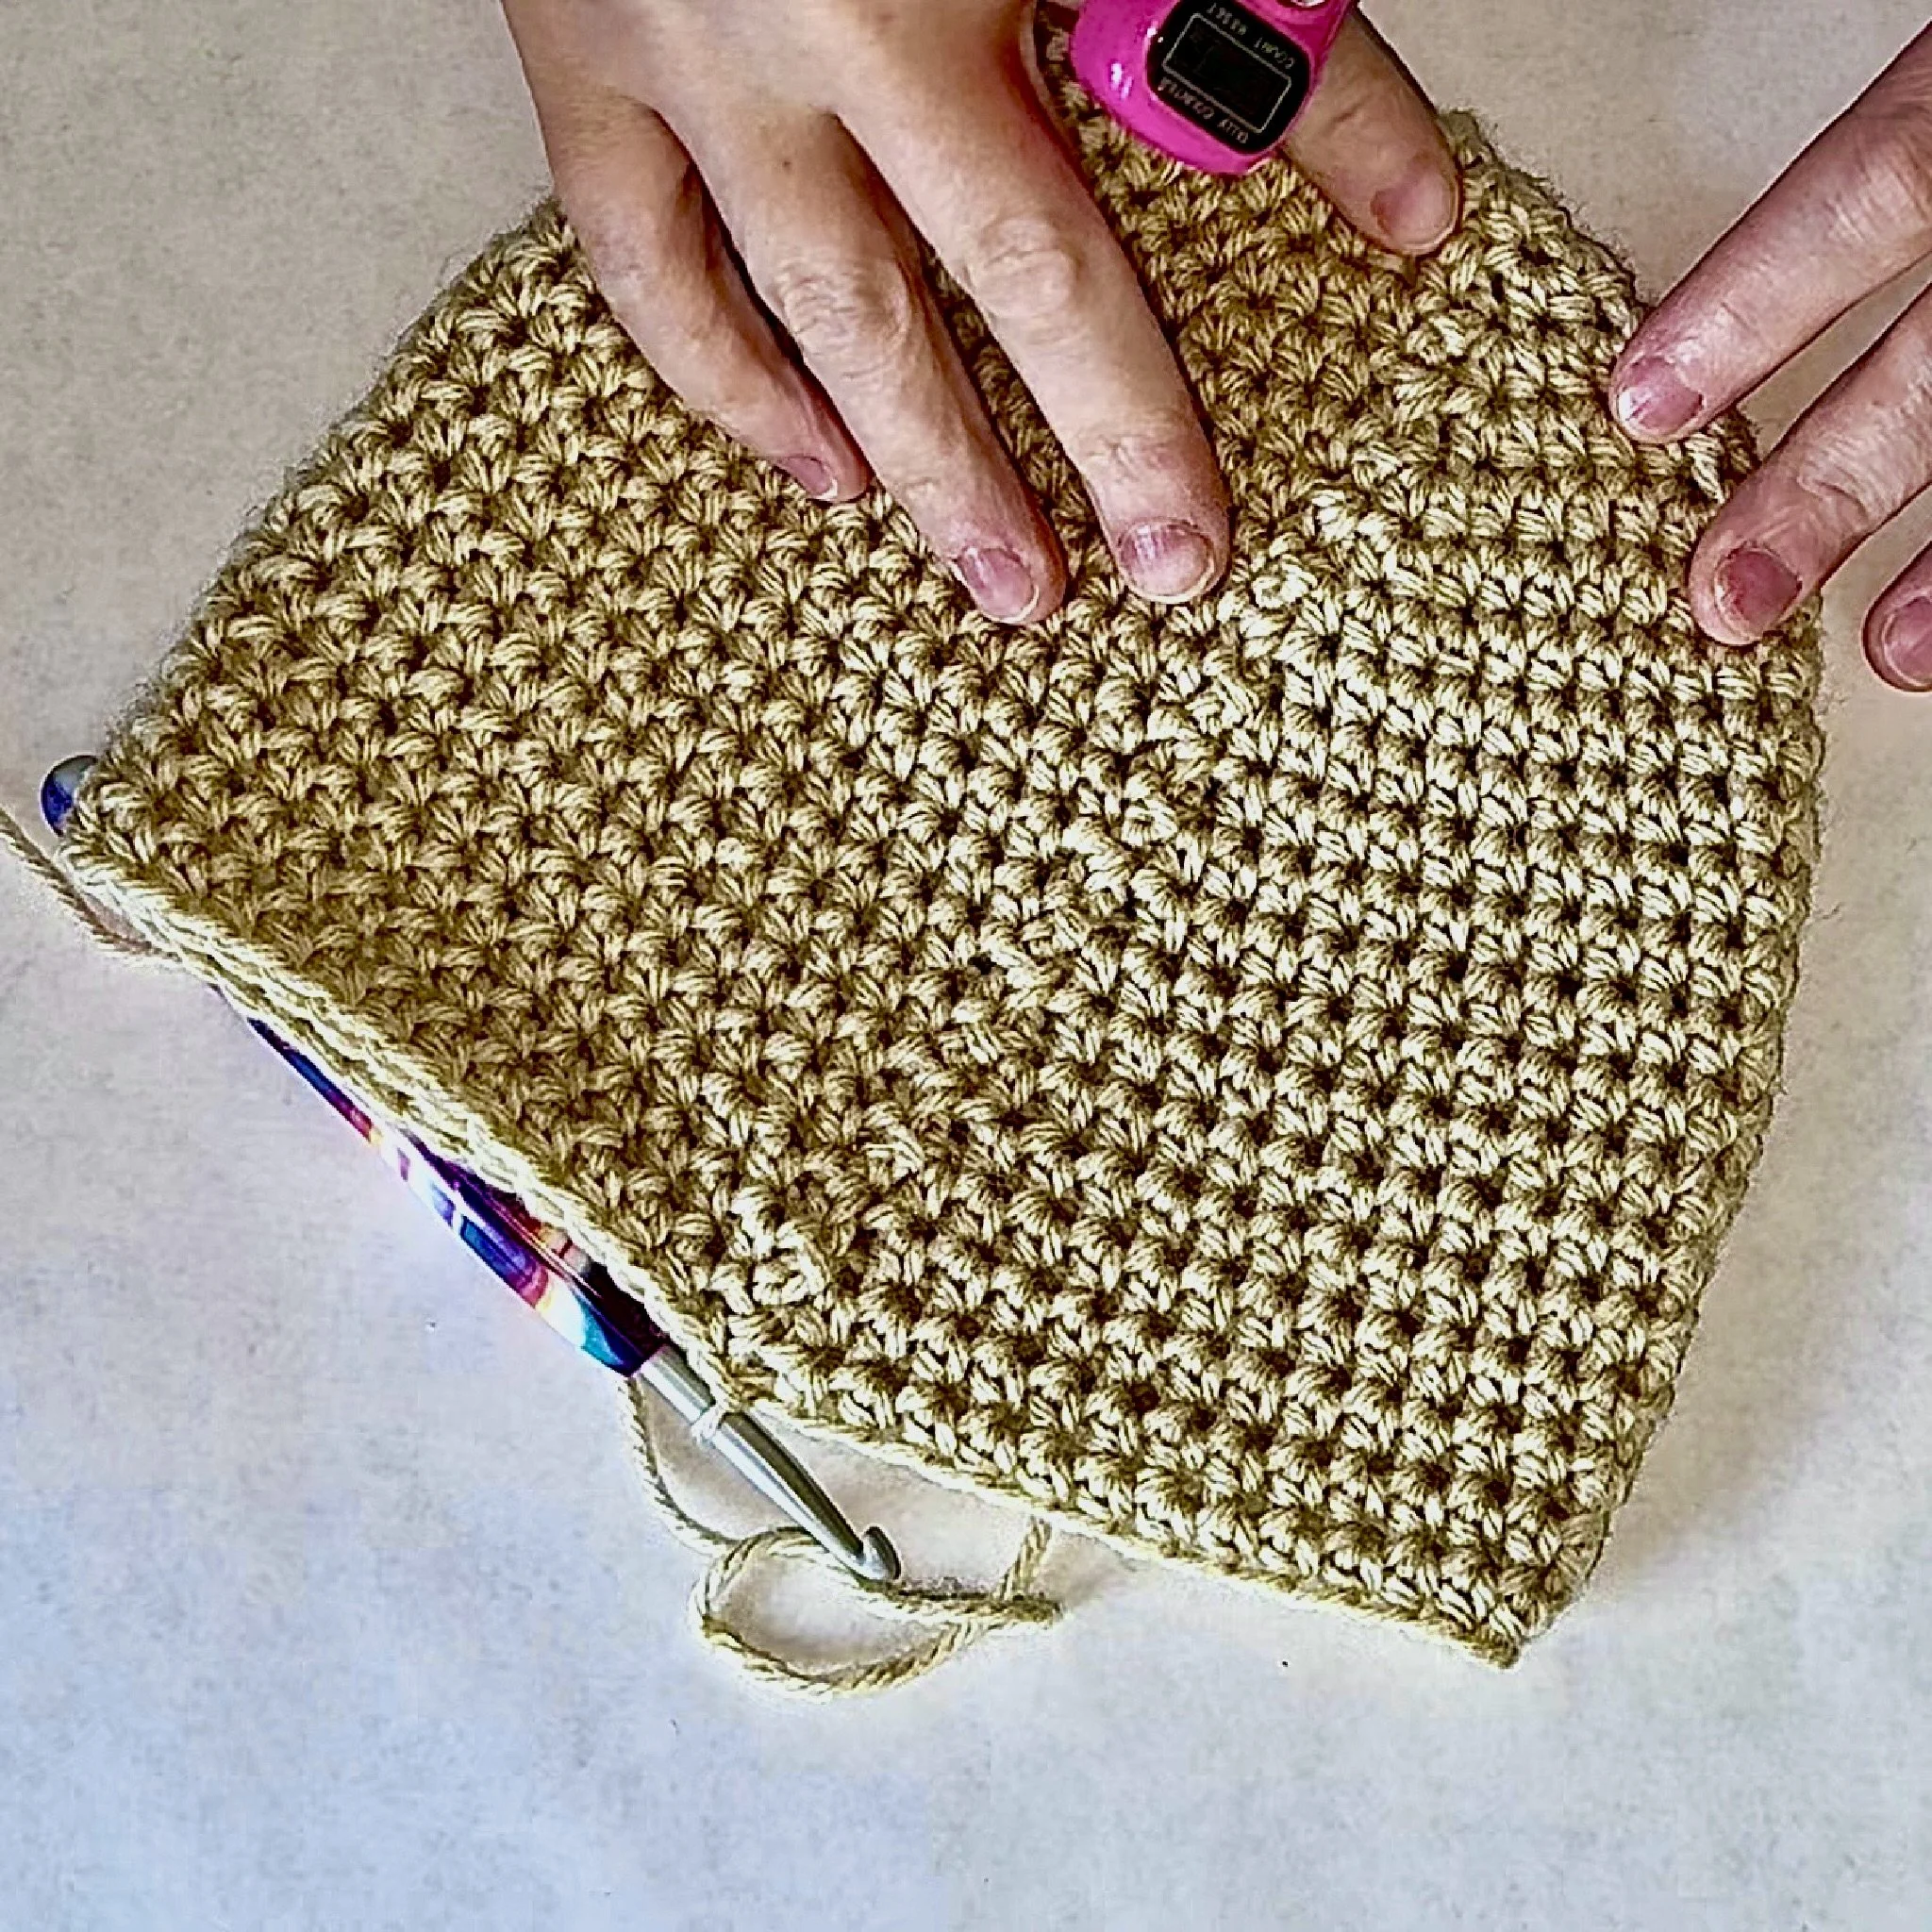
Presentation After Multiple Rounds
After several rounds, this is what the seam is going to look as I continue alternating my starting and finishing stitches between even and odd rows.
There is still a slight curve, but this is because I am making a hat in these images, so the curve is simply the curve of the garment. The seam itself is not what is curving.